Roof Installation Process: 6 Essential Steps Explained
Are you curious about the roof installation process and eager to prepare your home for years of protection? The roof installation process involves several key steps: removing old materials, assessing and repairing the structure, installing underlayment, applying flashing, and finally positioning shingles or roofing materials of choice. This sequence is vital to ensure a robust and long-lasting roof, safeguarding your home from various weather conditions.
DIY roofing can be tempting with its potential cost savings, but it’s crucial to consider the risks and necessary safety precautions. You’ll need to ensure the roof is walkable, use safety equipment like harnesses, and be mindful of weather conditions to prevent accidents. In many cases, consulting with professionals is wise to avoid pitfalls and ensure quality results.
Hello! I’m Jack Golini, the owner of Golini Roofing, bringing over 35 years of experience in the roof installation process. My team ensures each roof we work on is installed with meticulous craftsmanship and attention to detail, protecting homes across the North Shore area.
Roof installation process word list:
– asphalt shingle roof installation
– roofing process step by step
Understanding the Roof Installation Process
Installing a roof might seem like a daunting task, but breaking it down into steps makes it manageable. Let’s explore the roof installation process, detailing each stage to give you a clear picture of what happens from start to finish.
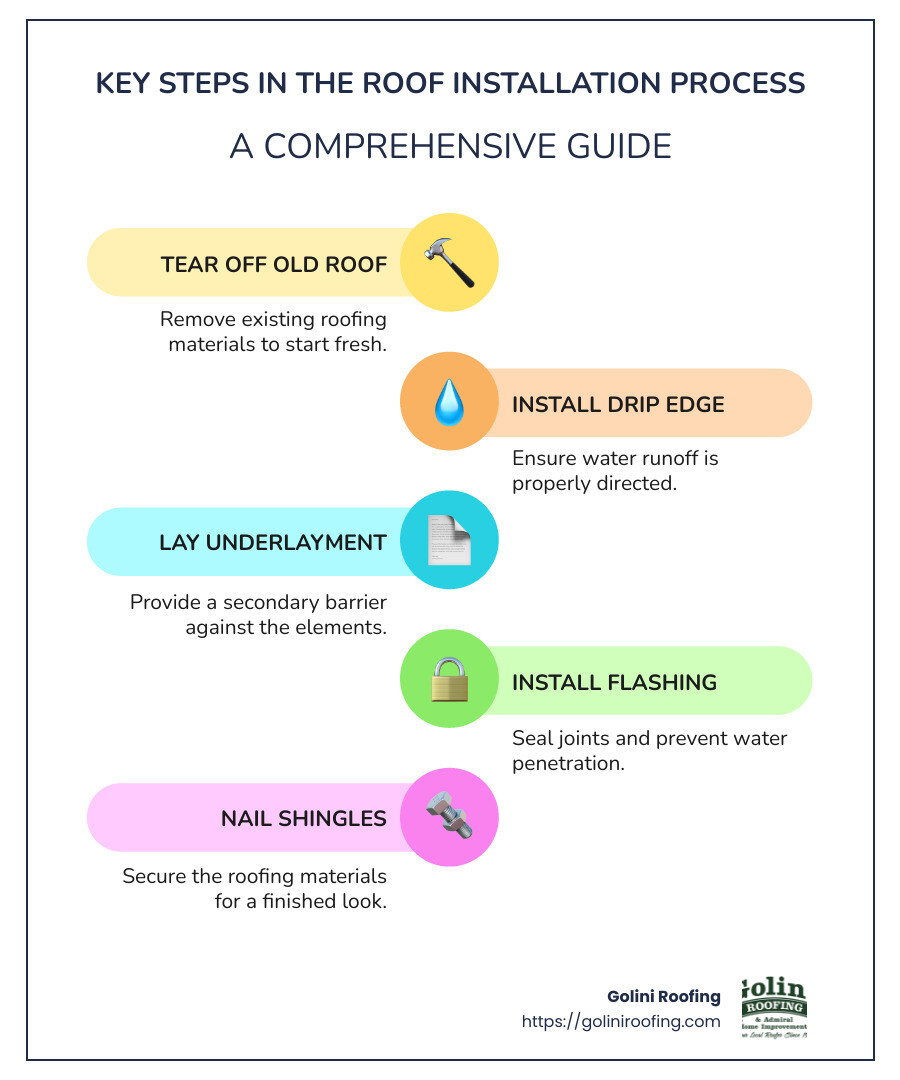
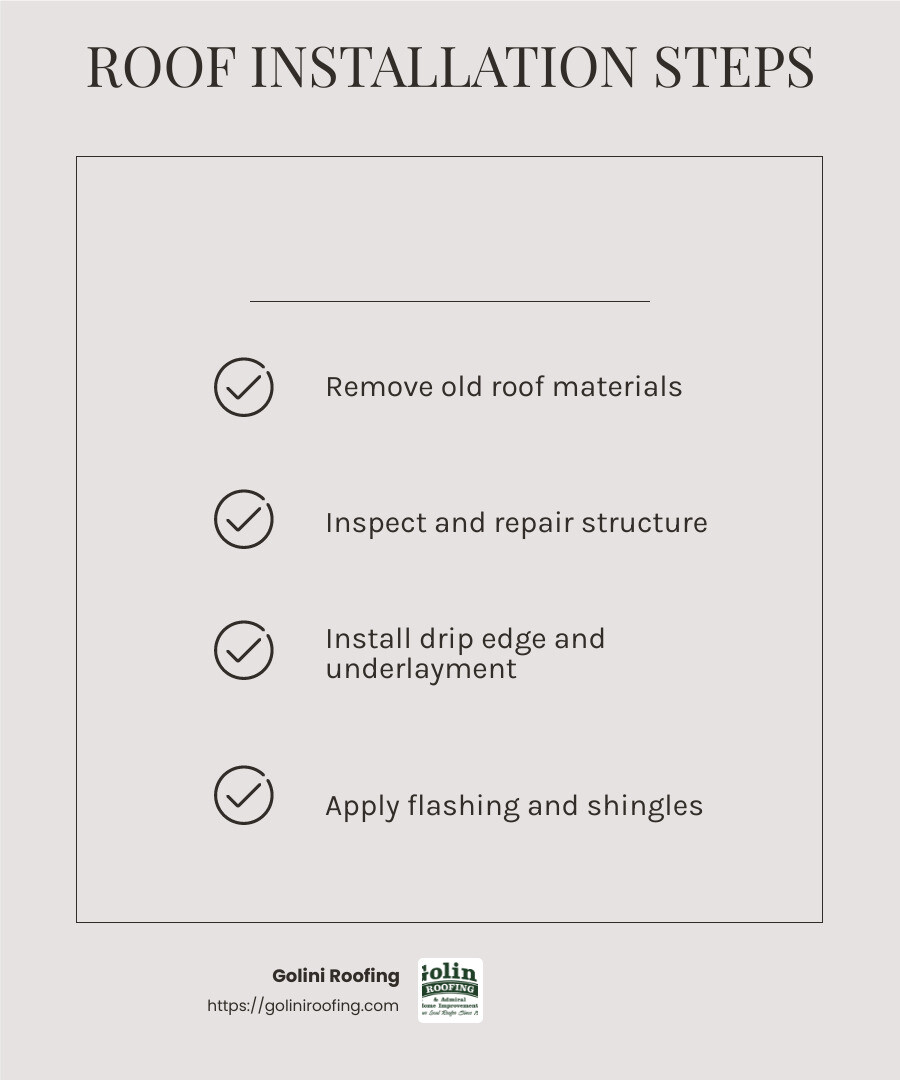
1. Removing the Old Roof
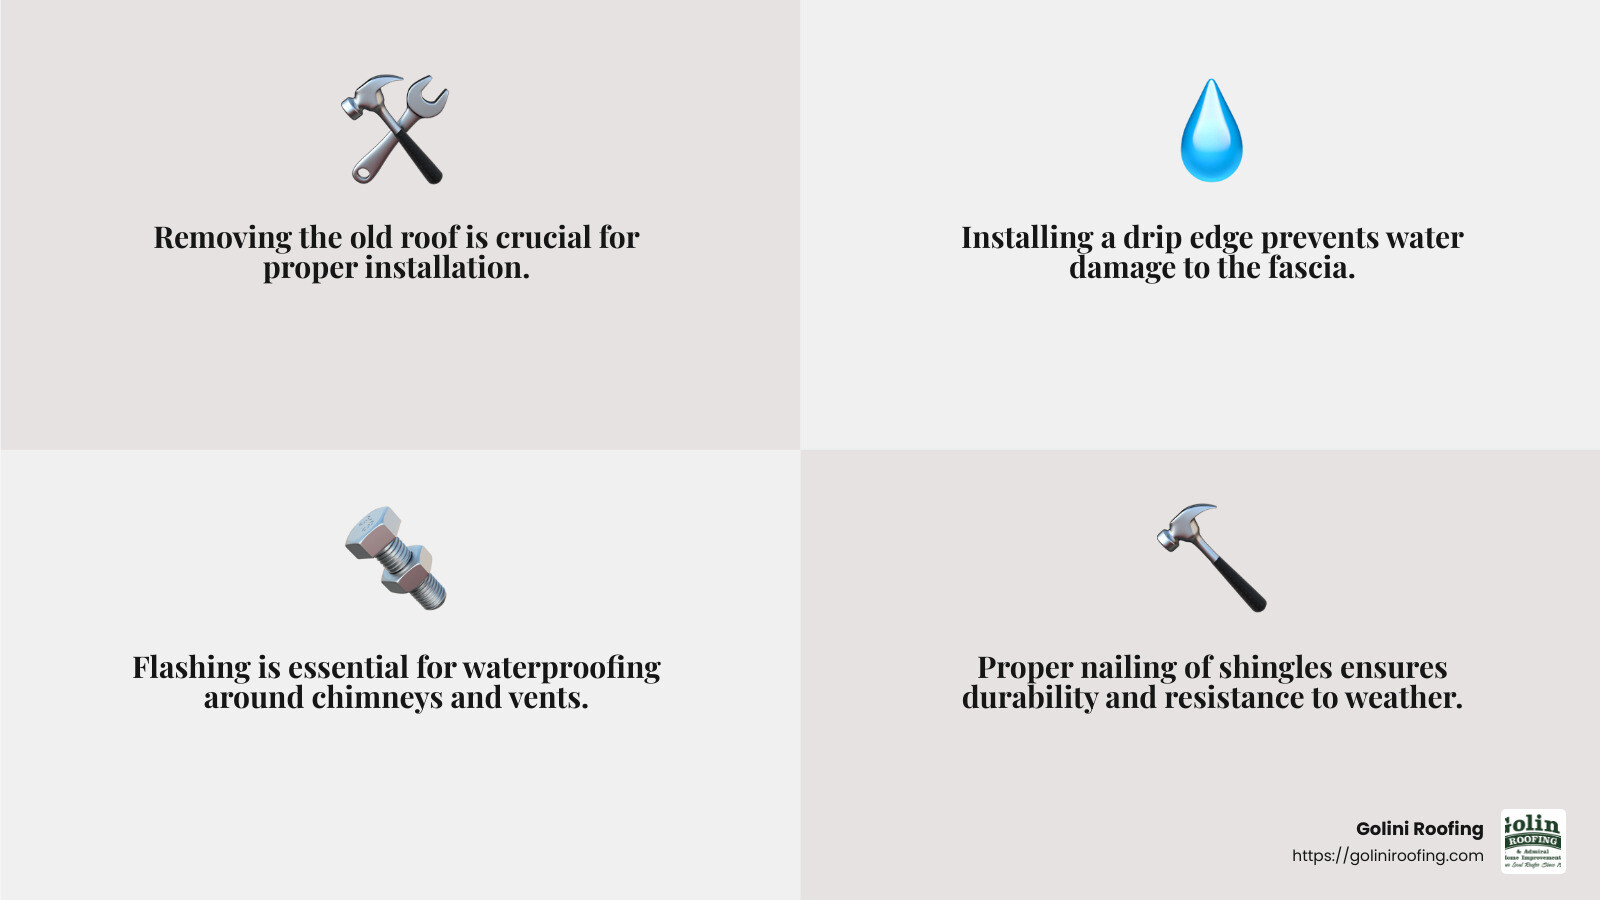
The first step is to remove the existing roof materials. This involves tearing off old shingles, tiles, or metal panels. It’s a messy job, so protective coverings are used to catch debris and protect your landscaping. Contractors ensure that all old materials are safely disposed of before proceeding.
2. Evaluating and Repairing the Structure
Once the old materials are off, the underlying structure is examined. This includes checking for any damage or rot in the sheathing or framing. Repairs or reinforcements are done as needed to ensure a sturdy foundation for the new roof.
3. Installing the Drip Edge and Underlayment
Before laying down the new roofing materials, a drip edge is installed along the edges of the roof. This metal strip helps direct water away from the fascia and prevents water from seeping underneath the roof.
Next comes the underlayment, a crucial waterproof barrier that goes over the roof deck. This layer adds extra protection against moisture, ensuring your roof stands up to the elements.
4. Applying Flashing
Flashing is installed around chimneys, vents, and other protrusions to prevent leaks. This metal or plastic barrier ensures water can’t penetrate these vulnerable areas. Proper installation of flashing is key to a leak-free roof.
5. Laying Shingles or Roofing Materials
Now for the exciting part: applying the new roofing materials! Whether you choose shingles, tiles, or metal panels, each type requires specific techniques for installation. This stage demands precision to ensure a tight seal and proper alignment.
6. Capping the Ridge
The final step is capping the ridge, the highest point of the roof. Ridge caps are specially designed to fit over the peak, providing a finished look and additional protection against weather.
By following these steps in the proper order, you ensure a durable and reliable roof. Each stage is vital to the overall integrity of the roof, safeguarding your home from various weather conditions.
With over 35 years of experience, Golini Roofing is committed to delivering exceptional craftsmanship in every project. Our attention to detail ensures your roof not only looks great but also stands the test of time.
Step-by-Step Roof Installation Guide
Installing a roof involves several critical steps that ensure durability and effectiveness. Here’s a detailed look at each stage of the roof installation process.
Tear Off the Old Roof
The initial phase is to remove the existing roofing material. This is often done using a roof shovel or pry bar to tear off old shingles or tiles. Contractors usually start from the top and work downwards, layer by layer. This method ensures that all debris is efficiently managed. It’s important to rent a dumpster or use a catch-all screen to collect debris and protect your property.
Install the Drip Edge
After the old roof is removed, the next step is installing the drip edge. This metal strip is placed along the edges of the roof. It helps guide water off the roof and away from the fascia, preventing water damage. The drip edge should be installed at a slight angle and nailed down flush to avoid protruding through the shingles.
Lay the Underlayment
The underlayment is a crucial waterproof barrier that sits between the roof deck and the new roofing material. Most commonly, felt paper is used, which is nailed down every 12 inches. In colder climates, self-stick underlayment may be required for extra protection against ice and water. This layer ensures that any moisture that gets under the shingles doesn’t damage the roof deck.
Install Flashing
Flashing is essential for waterproofing the areas around roof protrusions like chimneys and vents. It is typically made of metal and is installed to prevent leaks in these vulnerable areas. Proper flashing installation is crucial to ensure that water doesn’t seep into the roof structure.
Nail Down Shingles
Once the underlayment and flashing are in place, it’s time to install the shingles. This involves starting at the eaves and working upwards, overlapping each row. The shingles must be nailed in the designated nail zone to ensure they are secure and don’t protrude into the next layer.
Cap the Ridge
The last step is to install the ridge cap. This is a special type of shingle that fits over the roof’s peak, providing a finished look and additional protection. The ridge cap is installed with shingles going the opposite way to create a tight seal, allowing water and ice to flow down either side of the roof.
By following these steps in the proper order, you ensure a durable and reliable roof. Each stage is vital to the overall integrity of the roof, safeguarding your home from various weather conditions.
With over 35 years of experience, Golini Roofing is committed to delivering exceptional craftsmanship in every project. Our attention to detail ensures your roof not only looks great but also stands the test of time.
Essential Tools and Materials
Before you start on the roof installation process, having the right tools and materials is crucial. Proper preparation ensures efficiency and safety. Here’s what you need:
Tools Required
- Roofing Nailer: This is essential for fastening shingles quickly and securely. A pneumatic nailer connected to an air compressor is commonly used.
- Utility Knife: Ideal for cutting shingles and underlayment to the desired size.
- Chalk Line: Helps in marking straight lines for shingle alignment, ensuring a neat and professional finish.
- Tin Snips: Useful for cutting metal flashing and drip edges.
- Circular Saw: Handy for cutting through old roofing materials and new sheathing if needed.
- Stapler and Staples: Used for securing underlayment to the roof deck.
- Straightedge: Ensures accurate and straight cuts on materials.
Materials Required
- Asphalt Shingles: A popular choice due to their durability and cost-effectiveness. Choose a style and color that suits your home.
- Felt Underlayment: Provides a layer of protection between the roof deck and shingles. It helps in waterproofing and safeguarding against moisture.
- Drip Edge: Metal strips installed at the edges of the roof to direct water away from the fascia and prevent water damage.
- Flashing: Used around chimneys, vents, and other roof protrusions to prevent leaks. It’s typically made of metal and is crucial for waterproofing.
- Roofing Nails: Galvanized nails are recommended to prevent rust and ensure longevity.
- Sealant and Caulk: Used for sealing joints and around flashing to prevent water infiltration.
Safety Equipment
- Roof Safety Harness: Essential for preventing falls. Always wear a harness when working at heights.
- Work Gloves: Protect your hands from sharp tools and materials.
- Helmet: Provides protection from falling debris and accidental tool drops.
- Extension Ladder or Scaffolding: Ensures safe access to the roof. Make sure it’s stable and properly positioned before climbing.
- Protective Eyewear: Shields your eyes from dust and flying debris.
Safety First! Always prioritize safety by having a partner to assist and monitor. Never work alone, and be sure to check weather conditions before starting. Rain, wind, or lightning can make roofing extremely dangerous.
Having these tools, materials, and safety gear ready before starting your project will make the roof installation process smoother and more efficient. Preparation is key to a successful roofing job.
Safety Considerations for Roof Installation
When it comes to the roof installation process, safety should be your top priority. Here are some critical safety considerations to keep in mind:
Fall Protection
Working on a roof means you’re at risk of falling. To prevent this, always use a roof safety harness. A fall protection kit, including a harness, rope, and hook, costs about $100 and is a worthwhile investment. Make sure the harness fits properly and is secured to a stable anchor point.
Pro Tip: Always have a partner with you to ensure you’re safe and to assist in case of any emergency.
Weather Conditions
Weather plays a significant role in roof installation safety. Ideal temperatures for roofing are between 50 and 80 degrees Fahrenheit. Avoid working in wet, windy, or extremely hot conditions.
- Rain: Makes the roof slippery and dangerous.
- Wind: Can cause you to lose balance and could blow off materials.
- Heat: Prolonged exposure can lead to heat exhaustion.
Safety First: Check the weather forecast before starting your project. If conditions aren’t ideal, it’s better to postpone the work.
Ladder Safety
Your ladder is your lifeline to the roof, so it needs to be stable and secure. Follow these ladder safety tips:
- Weight Capacity: Ensure your ladder can support your weight plus the weight of any materials you might carry.
- Placement: Position the ladder on stable, flat ground. Extend it at least three feet above the roofline and tie it to the eave for stability.
- Climbing: Always face the ladder when climbing and maintain three points of contact (two hands and one foot, or two feet and one hand).
Quick Reminder: Never step on any rung that extends above the roof. This can cause the ladder to become unstable.
By keeping these safety considerations in mind, you can ensure a safer and more efficient roof installation process. Safety isn’t just a checklist—it’s a mindset. Prioritize it to protect yourself and anyone else working on the project.
Next, we’ll tackle some frequently asked questions about the roof installation process, addressing common concerns like the steps involved, costs, and project duration.
Frequently Asked Questions about Roof Installation Process
When it comes to replacing your roof, many questions can arise. Here, we address some of the most common ones to help you understand the roof installation process better.
What are the steps to installing a roof?
Installing a roof involves several key steps that must be followed in the proper order:
- Tear Off Old Roof: Start by removing the existing shingles and underlayment. This clears the way for the new materials and allows for a thorough inspection of the roof deck.
- Inspect and Repair Decking: Before moving forward, check the roof deck for any damage. Repair or replace any compromised areas to ensure a solid foundation for the new roof.
- Install Drip Edge: A drip edge is installed at the edges of the roof to direct water away, protecting the underlying structure.
- Lay Underlayment: This layer acts as a moisture barrier, providing additional protection against water infiltration.
- Install Flashing: Flashing is used around areas prone to leaks, such as chimneys and skylights, to prevent water from seeping in.
- Nail Shingles: Shingles are then installed, starting from the bottom edge and working upwards in a staggered pattern.
- Cap Ridge: Finally, ridge caps are installed at the peak to provide a finished look and additional protection.
Is $30,000 too much for a roof?
The cost of a roof replacement can vary significantly based on several factors:
- Roof Size: Larger roofs require more materials and labor, increasing the overall cost.
- Material Choice: Materials like asphalt shingles are generally more affordable, while metal or tile roofs can be more expensive. Asphalt shingles might cost around $7 per square foot, whereas metal roofs could go up to $40 per square foot.
- Labor Rates: Labor costs can account for up to 60% of the total expense. These rates vary by region, with some areas charging more due to higher living costs.
- Additional Repairs: If your roof deck needs repairs or if there are structural issues, these can add to the cost.
For a typical roof replacement, costs can range widely, but understanding these factors can help you determine if $30,000 is reasonable for your specific situation.
How long does roof replacement take?
The duration of a roof replacement project depends on several elements:
- Roof Size and Complexity: A larger or more complex roof may take longer to replace.
- Weather Conditions: Weather can cause delays. Ideal conditions are dry and mild, while rain or extreme temperatures can slow down the process.
- Crew Size and Efficiency: A well-coordinated team can complete the work more quickly. Generally, a straightforward roof replacement takes anywhere from a few days to a week.
Understanding these factors can help set realistic expectations for your roof replacement timeline.
By familiarizing yourself with these aspects of the roof installation process, you can make informed decisions and ensure a smooth project from start to finish. Next, we’ll explore the essential tools and materials needed for a successful roof installation.
Conclusion
At Golini Roofing, we believe that exceptional craftsmanship and customer satisfaction are the cornerstones of a successful roofing project. With over 35 years of experience, we have honed our skills to deliver top-quality roofing solutions for both residential and commercial clients in Massachusetts.
Craftsmanship is not just a buzzword for us. We carefully hand-nail each shingle, ensuring that every roof we install is durable and built to last. This attention to detail sets us apart and guarantees that our roofs can withstand harsh weather conditions while enhancing the beauty of your home.
Our dedication to customer satisfaction goes beyond the installation process. From the moment you contact us, we work closely with you to understand your needs and preferences. We offer a range of roofing materials and styles, allowing you to choose the perfect fit for your home. Our team is committed to providing clear communication and support throughout the project, ensuring that you are informed and comfortable with every decision.
We take pride in our ability to transform roofs into reliable and aesthetically pleasing structures. Whether you’re in Wakefield or any of the surrounding areas like Burlington, Lynnfield, or Winchester, you can trust Golini Roofing to deliver exceptional results.
Ready to start your roofing project with a team that values quality and your satisfaction? Contact Golini Roofing today for a free consultation and experience the difference of working with Massachusetts’ premier roofing contractor.
