Asphalt Shingle Roof Repair: Top 5 Expert Solutions 2025
Asphalt shingle roof repair is crucial for maintaining a home’s safety and longevity. Ensuring your roof remains in top condition shields your property from harsh weather and prevents potential damage. Damaged shingles can lead to leaks and structural issues, but timely repairs can protect your investment and save you money.
- Roof Protection: Regular maintenance is key to weather resistance and durability.
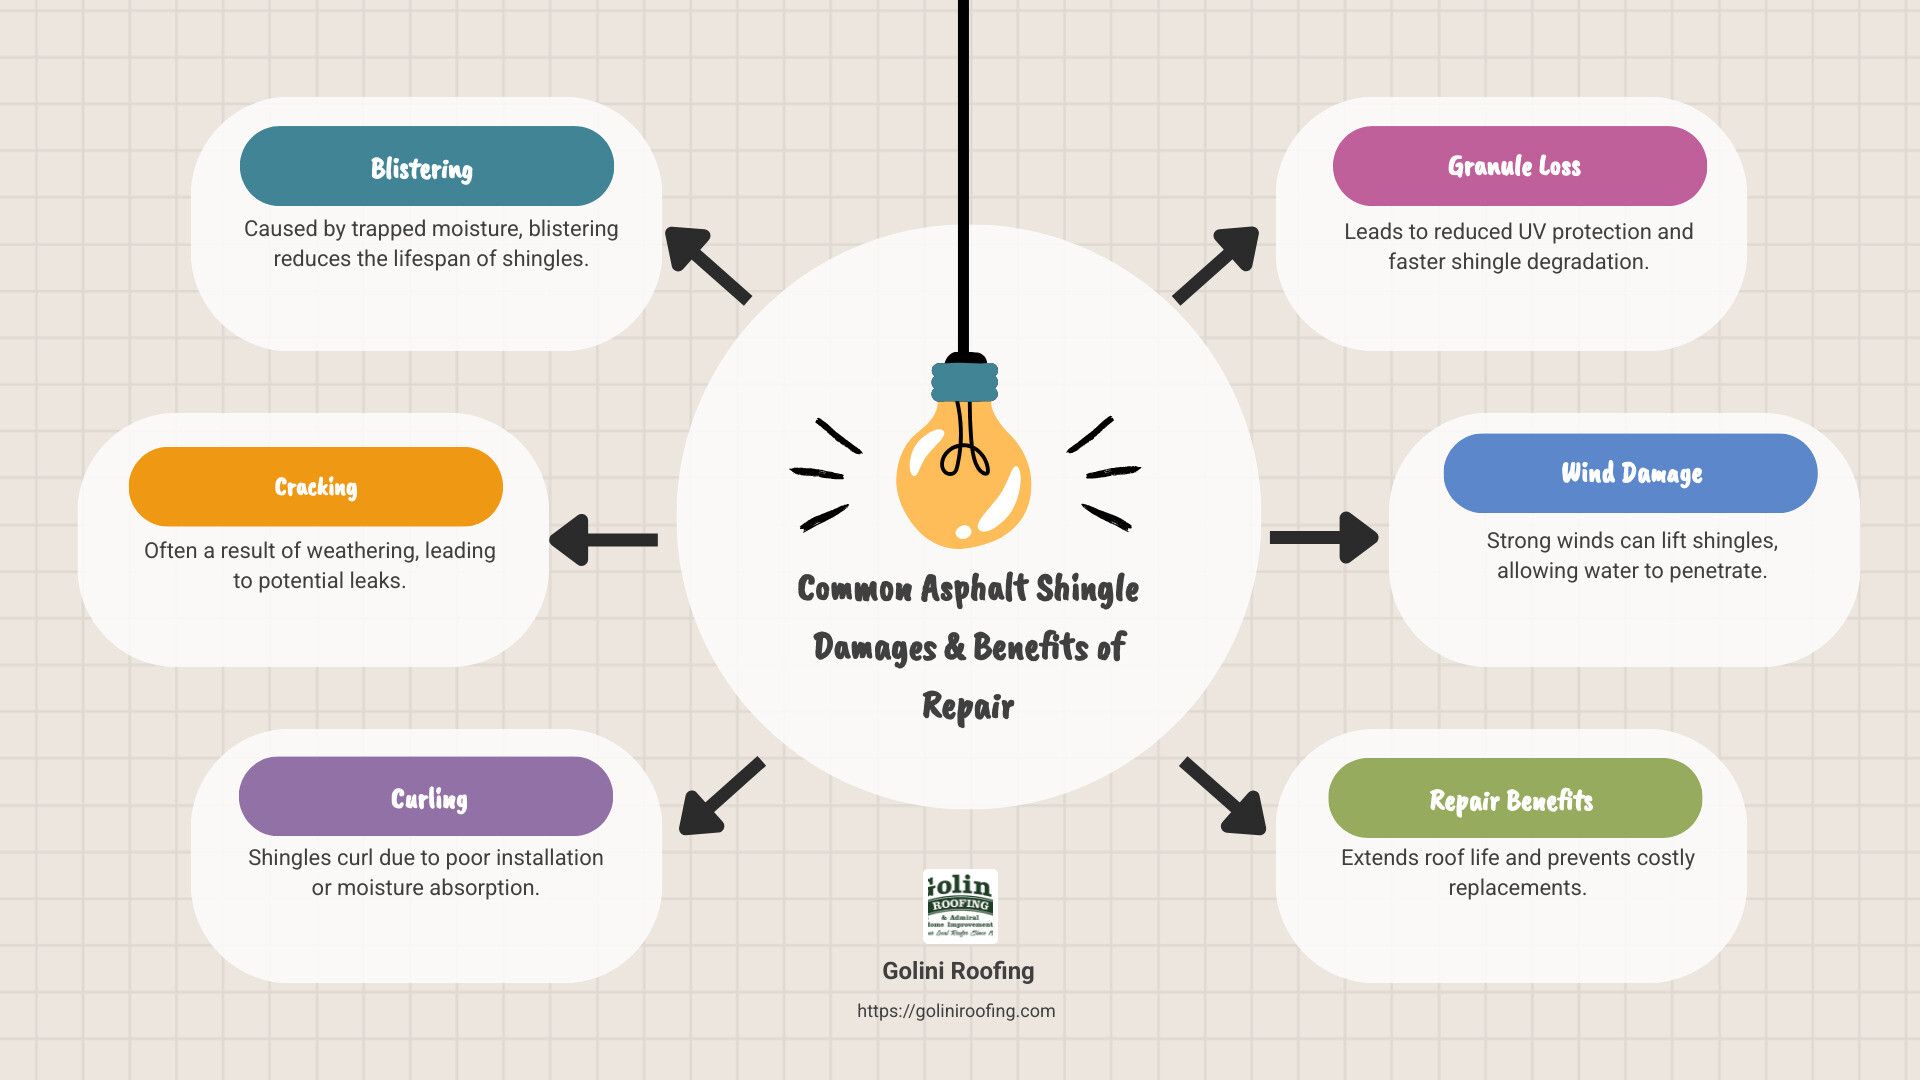
- Common Shingle Damage: Look out for blistering, cracking, curling, missing granules, and wind damage.
- Benefits of Repair: Extend your roof’s life and avoid costly replacements.
As the owner of Golini Roofing, I’ve been in the roofing industry for over 35 years, specializing in asphalt shingle roof repair. My experience ensures top-notch craftsmanship and customer satisfaction. In the sections that follow, I’ll guide you through identifying shingle damage and choosing the right repair techniques.
Learn more about asphalt shingle roof repair:
– fix roof shingles
– roof repairs near me
– roofing services
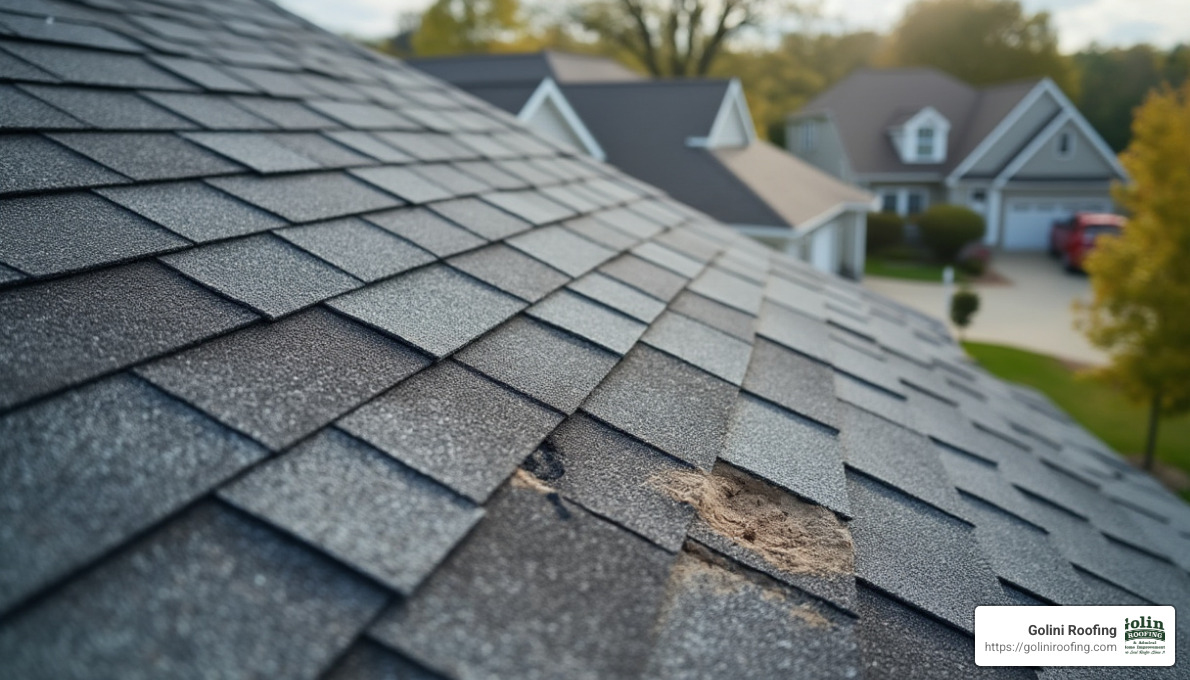
Identifying Common Asphalt Shingle Damage
Keeping an eye on your roof’s condition is essential. Spotting damage early can save you from bigger headaches later. Here are the common types of asphalt shingle damage you should watch out for:
Blistering
Blistering looks like small bubbles on the shingles. It’s often caused by trapped moisture or too much heat. If left unchecked, these blisters can pop, leading to leaks.
Cracking
Cracked shingles are a sign of wear and tear. Weather exposure and aging cause these cracks, making your roof more vulnerable to water damage. Regular inspections can help catch these before they become a bigger issue.
Curling
Curling happens when the edges of shingles start to lift. This can be due to moisture, poor installation, or aging. Curled shingles lose their ability to shield your roof effectively.
Granule Loss
Shingles have granules that protect them from the sun’s UV rays. Over time, these granules can fall off, leaving the shingles exposed. You’ll notice bald spots or granules in your gutters.
Wind Damage
High winds can lift or tear off shingles. This leaves parts of your roof exposed, increasing the risk of leaks and further structural damage.
Regular inspections, at least twice a year, can help catch these issues early. Look for signs like bald spots, curling, or missing shingles. If you spot any of these, it’s time to think about asphalt shingle roof repair. Timely repairs not only extend your roof’s life but also save you from expensive replacements down the line.
Next, we’ll dive into the tools and materials you’ll need for effective shingle repairs.
Tools and Materials Needed for Asphalt Shingle Roof Repair
Repairing your asphalt shingle roof doesn’t require a truckload of tools, but having the right ones can make the job easier and safer. Here’s a rundown of what you’ll need:
Essential Tools
- Flat Pry Bar: This is your go-to tool for gently lifting shingles. It helps you remove damaged shingles without causing harm to the surrounding ones. Make sure to use it carefully to avoid any additional damage.
- Hammer: A standard claw hammer will do the trick. You’ll use this to drive roofing nails into place. Make sure your hammer is comfortable to use, as you’ll be spending a bit of time with it.
- Utility Knife: This is handy for cutting shingles to fit around tricky spots. A sharp blade ensures clean cuts, which are crucial for a snug fit.
Materials
- Roofing Cement: This sticky stuff is vital for sealing the shingles and preventing leaks. It acts as a glue to keep everything in place, especially in areas prone to wind.
- Roofing Nails: Opt for 1-and-1/4-inch nails. These are the standard size for securing shingles. They’re long enough to hold but not so long that they damage the roof deck.
Safety Gear
- Safety Glasses and Gloves: Protect your eyes from debris and your hands from sharp edges. Safety first!
- Non-Slip Shoes: Working on a roof can be tricky. Non-slip shoes give you better grip and stability.
- Ladder: Ensure it’s sturdy and positioned on stable ground. Double-check it’s locked in place before climbing.
Setting up your workspace properly is just as important as having the right tools. Make sure your ladder is secure and plan to work on a dry day. Wet shingles can be slippery and dangerous.
With these tools and materials, you’re well-equipped to tackle asphalt shingle roof repair. Whether you’re fixing a few cracked shingles or addressing a more significant issue, having the right gear makes the process smoother and safer.
Next, we’ll walk you through the step-by-step guide to repairing your asphalt shingle roof.
Step-by-Step Guide to Asphalt Shingle Roof Repair
Repairing your asphalt shingle roof might seem daunting, but with the right steps, it’s manageable. Here’s a simple guide to help you through the process.
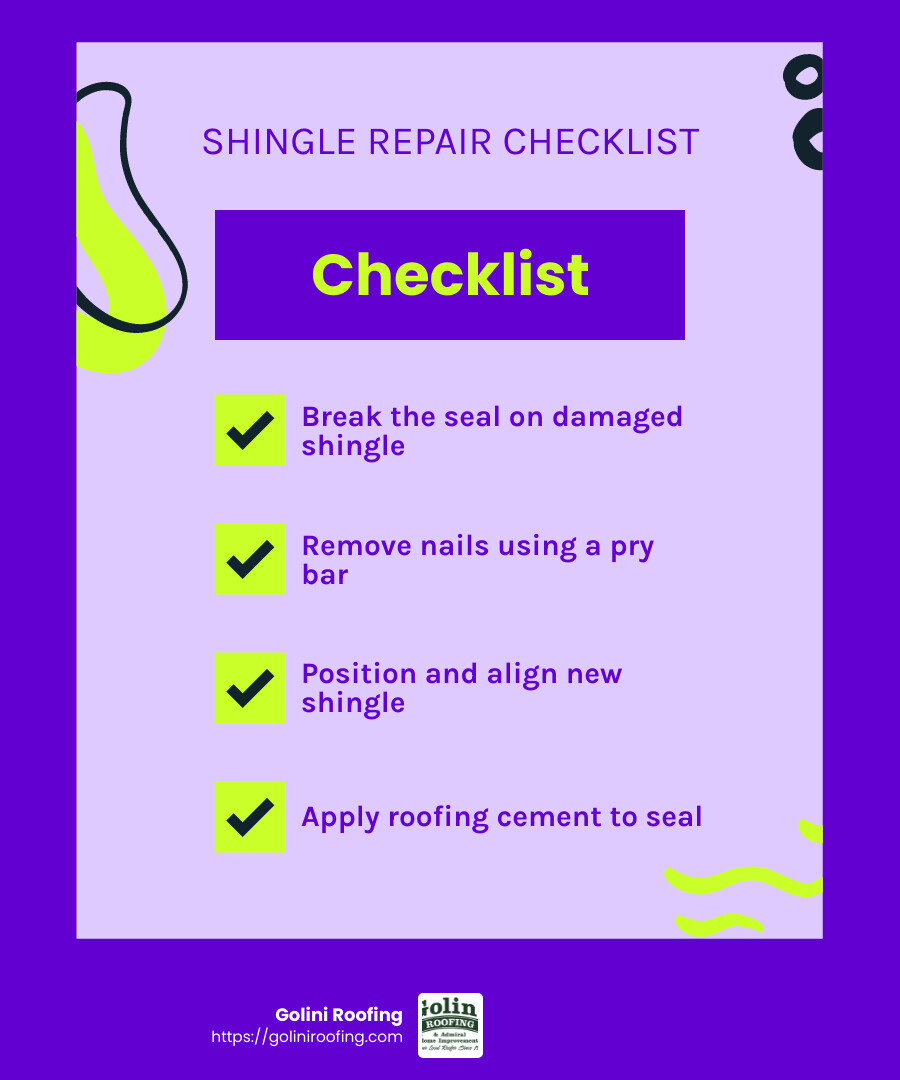
Removal Process
- Break the Seal: Start by breaking the seal on the damaged shingle. Use a flat pry bar to gently lift the edge of the shingle. Be cautious, especially in cooler weather, as shingles can be more brittle.
- Remove Nails: Slide the pry bar under the shingle to lift and remove the nails. Each shingle is held by two rows of nails, so you might need to remove nails from the shingles above as well.
- Lift and Remove: Once all nails are out, carefully lift the damaged shingle away from the roof.
Replacement Process
- Position the New Shingle: Slide the new shingle into place. Ensure it aligns with the existing shingles for a seamless look.
- Nail It Down: Secure the new shingle with roofing nails. Place nails about 1 inch from each edge and ensure they’re flush with the shingle surface to avoid water seepage.
- Check Alignment: Make sure the new shingle sits flat and is aligned with the surrounding shingles. Proper alignment is key to maintaining your roof’s integrity.
Sealing Techniques
- Apply Roofing Cement: Dab roofing cement under the edges of the new shingle. This seals it to the roof and prevents wind uplift.
- Secure the Edges: Press down firmly on the edges to ensure the cement bonds well. This step is crucial for preventing leaks.
- Inspect Your Work: Once everything is in place, double-check that all shingles are secure and sealed. Look for any gaps or uneven spots that might need additional cement.
By following these steps, you can effectively manage asphalt shingle roof repair. Always prioritize safety by using your gear and working in suitable weather conditions. With patience and the right approach, you can extend the life of your roof and keep it looking great.
Next, we’ll explore techniques for addressing specific shingle issues, like curling and cracking.
Techniques for Repairing Specific Shingle Issues
When it comes to asphalt shingle roof repair, different problems require different approaches. Let’s explore how you can tackle common shingle issues like curled, cracked, or missing shingles.
Curled Shingles
Curled shingles can often be fixed without replacement, saving you time and money. Here’s how:
- Soften the Shingle: On a warm day, gently press the curled shingle down to see if it softens. If it’s too stiff, use a heat gun to warm it up slightly, being careful not to overheat and damage it.
- Apply Roofing Cement: Once pliable, lift the curled edges and apply roofing cement underneath. This will help the shingle adhere back to the roof.
- Weigh It Down: Place a brick or heavy object on top of the shingle for at least 24 hours to ensure it stays flat.
Cracked Shingles
Cracked shingles can lead to leaks if not addressed promptly. Here’s a simple fix:
- Seal the Crack: Clean the area and apply a generous amount of roofing sealant along the crack. Use a putty knife to spread it evenly.
- Reinforce with a Patch: Cut a piece of replacement shingle to fit over the crack and cement it in place. This adds an extra layer of protection.
- Nail It Securely: Use roofing nails to secure the patch, making sure they’re flush with the shingle surface.
Missing Shingles
Missing shingles leave your roof vulnerable to water damage. It’s crucial to replace them quickly:
- Prepare the Area: Remove any remaining nails or debris from the spot where the shingle is missing.
- Install a New Shingle: Slide a new shingle into place, aligning it with the surrounding shingles for a uniform appearance.
- Secure with Nails: Use roofing nails to attach the new shingle, placing them about 1 inch from each edge.
- Seal the Edges: Apply roofing cement under the edges of the new shingle to prevent wind uplift and water seepage.
By addressing these specific shingle issues, you can effectively maintain your roof’s integrity and appearance.
Next, we’ll answer some frequently asked questions about asphalt shingle roof repair, including how to handle partial repairs and fix leaks.
Frequently Asked Questions about Asphalt Shingle Roof Repair
Can you repair a section of roof shingles?
Yes, you can repair a section of roof shingles, but it’s important to understand the scope of the damage first. Partial repairs are possible when the damage is limited to a small area. For instance, if you notice a few shingles that are cracked or missing, you can replace just those without having to redo the entire roof.
To do this, you’ll need to carefully remove the damaged shingles and replace them with new ones, ensuring they align perfectly with the existing shingles. This helps maintain the roof’s appearance and functionality. However, if a large section is affected, it might indicate a more serious issue that requires a full roof replacement.
How do you fix a leaking asphalt shingle?
Fixing a leak in an asphalt shingle roof involves a few key steps. First, identify the source of the leak, which could be due to damaged shingles, cracked flashing, or worn-out underlayment. Once located, you can proceed with the repair:
- Remove Debris: Clean the area around the leak to ensure a clear working space.
- Apply Roofing Cement: Use roofing cement to seal any visible cracks or holes in the shingles. This acts as a barrier to prevent water from seeping through.
- Replace Damaged Shingles: If the leak is due to severely damaged shingles, replace them entirely. Make sure to use roofing nails to secure new shingles in place.
- Check the Underlayment: If the underlayment is compromised, it might need replacing to ensure proper waterproofing.
By following these steps, you can effectively fix a leaking asphalt shingle and protect your home from further water damage.
What is the most common damage done to asphalt shingles?
Asphalt shingles are susceptible to several types of damage, with blistering, curling, and cracking being the most common.
- Blistering occurs when moisture gets trapped within the shingle, causing bubbles to form. These blisters can pop, leading to further damage.
- Curling happens when the edges of shingles lift, often due to aging or poor installation. Curled shingles can expose the roof to water infiltration.
- Cracking is typically a result of weather exposure, like extreme heat or cold, which causes the shingles to become brittle and break.
Regular inspections and maintenance can help identify these issues early, allowing you to address them before they lead to significant damage. Understanding these common problems is crucial for effective asphalt shingle roof repair.
Next, let’s explore the importance of preventative maintenance and professional inspections to keep your roof in top condition.
Conclusion
Taking care of your roof is crucial for its longevity. Preventative maintenance is the first step in ensuring your asphalt shingles stay in good shape. Regular checks can catch small issues before they become big problems. Look for signs like curling, cracking, or missing shingles. It’s a simple process that can save you a lot of money in the long run.
Professional inspections are equally important. Even if you’re diligent with DIY checks, having an expert look at your roof every few years is wise. Professionals can spot issues that might be easy to miss. They can also advise on any preventative measures you should take. This ensures that your roof is always ready to face the elements.
At Golini Roofing, we believe in the power of both preventative maintenance and expert inspections. With over 35 years of experience, we specialize in providing high-quality roofing services. Whether it’s a small repair or a complete roof overhaul, our team is here to help. We pride ourselves on meticulous craftsmanship, ensuring your roof is built to last.
If you’re in Massachusetts and need assistance with your roof, consider reaching out to us. Our services cover areas like Burlington, Lynnfield, and Wakefield, among others. Trust us to keep your roof in top condition, protecting your home and giving you peace of mind.
For more information on our services, visit our roofing services page.
Regular maintenance and professional care are key to a long-lasting roof. Don’t wait for problems to arise—take action today to ensure the health and safety of your home.
