Fix Roof Shingles: 5 Proven DIY Tips for 2024 Success
Fix roof shingles with these practical DIY tips to safeguard your home from weather elements. Your roof is your home’s first line of defense, and keeping it in top condition is crucial. A quick inspection can reveal issues like blistering, cracking, or missing shingles. Taking action to repair these problems not only prevents costly damage but also extends the life of your roof.
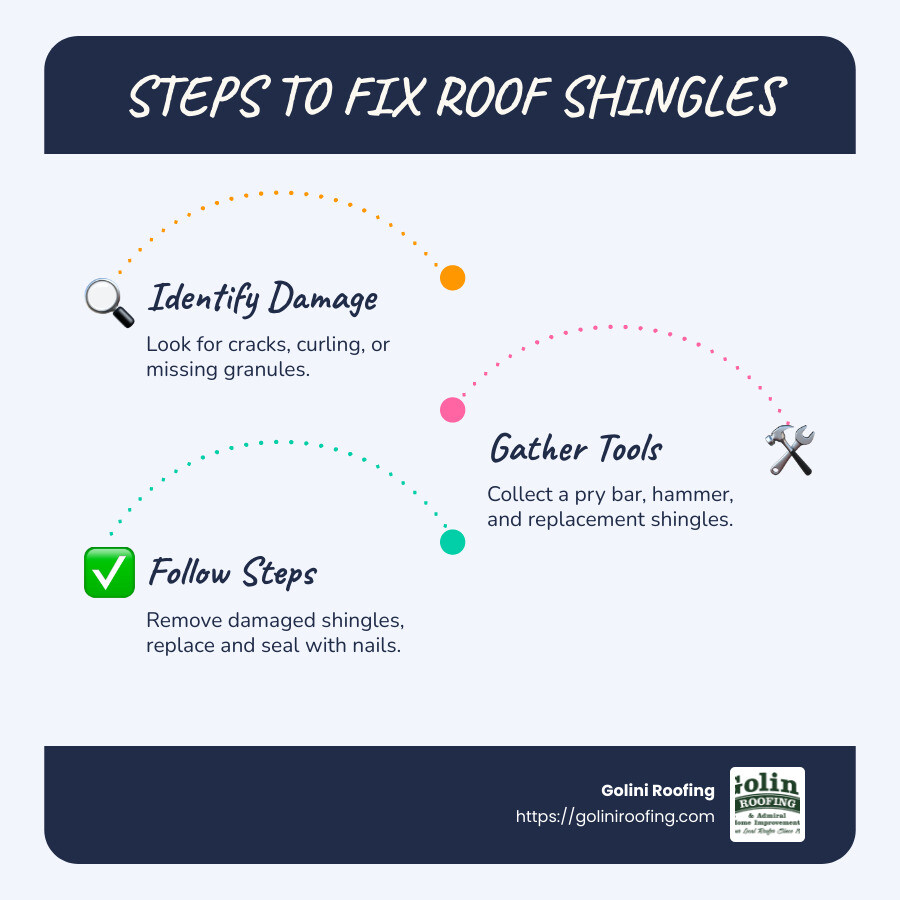
- Identify Damage: Look for cracks, curling, or missing granules.
- Gather Tools: You’ll need a pry bar, hammer, and replacement shingles.
- Follow Steps: Remove damaged shingles, secure new ones with nails, and seal for durability.
As a roofing expert based in the North Shore area, I, Jack Golini, have over 35 years of experience in helping homeowners fix roof shingles with minimal disruption and exceptional craftsmanship. Ensuring your home’s protection against harsh weather is my priority.
Explore more about fix roof shingles:
– roofing services
– roof installation near me
– roofing contractor near me
Identifying Common Shingle Damage
Spotting shingle damage early is your best defense against costly repairs. Here are the most common types of shingle damage you might encounter:
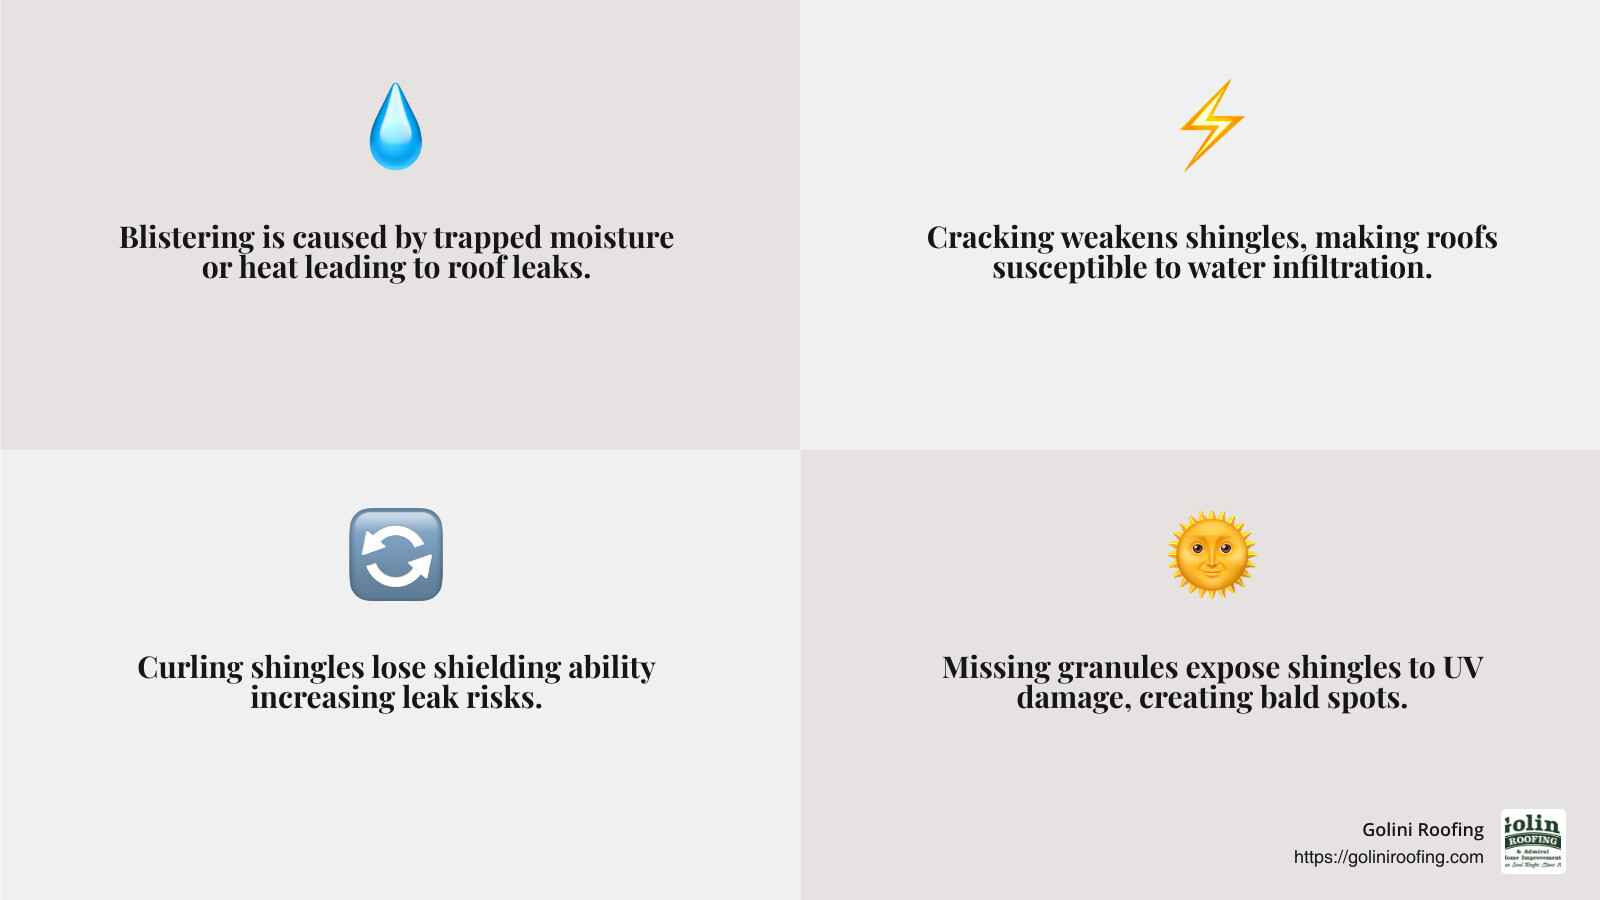
Blistering
Blistering occurs when trapped moisture or excessive heat causes small, raised areas on shingles. These blisters can eventually pop, leaving your roof vulnerable to leaks. Regular inspections can help catch blistering early, saving you from more extensive damage down the road.
Cracking
Over time, exposure to weather elements can lead to cracking or splitting of shingles. This weakens their protective ability, making your roof susceptible to water infiltration. Cracks often appear as thin lines across the shingle surface and should be addressed promptly to maintain your roof’s integrity.
Curling
Curling shingles are easy to spot as their edges begin to lift upward. This can happen due to aging, moisture, or poor installation. When shingles curl, they lose their ability to shield your home effectively, increasing the risk of leaks.
Missing Granules
Granules protect shingles from harmful UV rays and weathering. When they begin to fall off, often due to age or impact, the shingles become exposed to sun damage. Look for bald spots on your shingles as a sign of missing granules.
Wind Damage
High winds can lift or completely tear off shingles, leaving parts of your roof exposed. This not only increases the chance of leaks but can also lead to structural damage if not addressed. After a windstorm, check your roof for any missing or displaced shingles.
Perform roof inspections at least twice a year, ideally in spring and fall. Look for bald spots, nails popping out, warped or buckled shingles, and any mold or mildew growth. Early identification of these issues can save you from expensive repairs and extend the life of your roof.
Tools and Materials Needed for Shingle Repair
When it comes to fixing roof shingles, having the right tools and materials can make the process smoother and safer. Here’s a breakdown of what you’ll need:
Essential Tools
- Brick or Heavy Object: Use this to weigh down curled shingles temporarily, ensuring they stay flat while you work on them.
- Flat Pry Bar: This is crucial for gently lifting shingles and removing nails without damaging the surrounding area.
- Hammer: You’ll need this for driving roofing nails and securing new shingles in place.
- Ladder: A stable ladder is essential for safely accessing your roof. Ensure it’s placed on solid ground and extends at least three feet above the edge of the roof for stability.
- Putty Knife: Handy for applying roofing cement and sealant precisely.
- Utility Knife: Use this for cutting replacement shingles to size and trimming any excess material.
Necessary Materials
- Replacement Shingles: Always have spare shingles that match your existing roof. This ensures a seamless repair and maintains the roof’s appearance.
- Roofing Cement: This adhesive helps secure shingles and seals edges to prevent water intrusion.
- Roofing Nails (1-and-1/4-inch): These are used to fasten shingles. Ensure they are the right length to secure the shingles without penetrating too deeply.
- Roofing Sealant: Important for sealing edges and any small gaps to improve the weatherproofing of your repair.
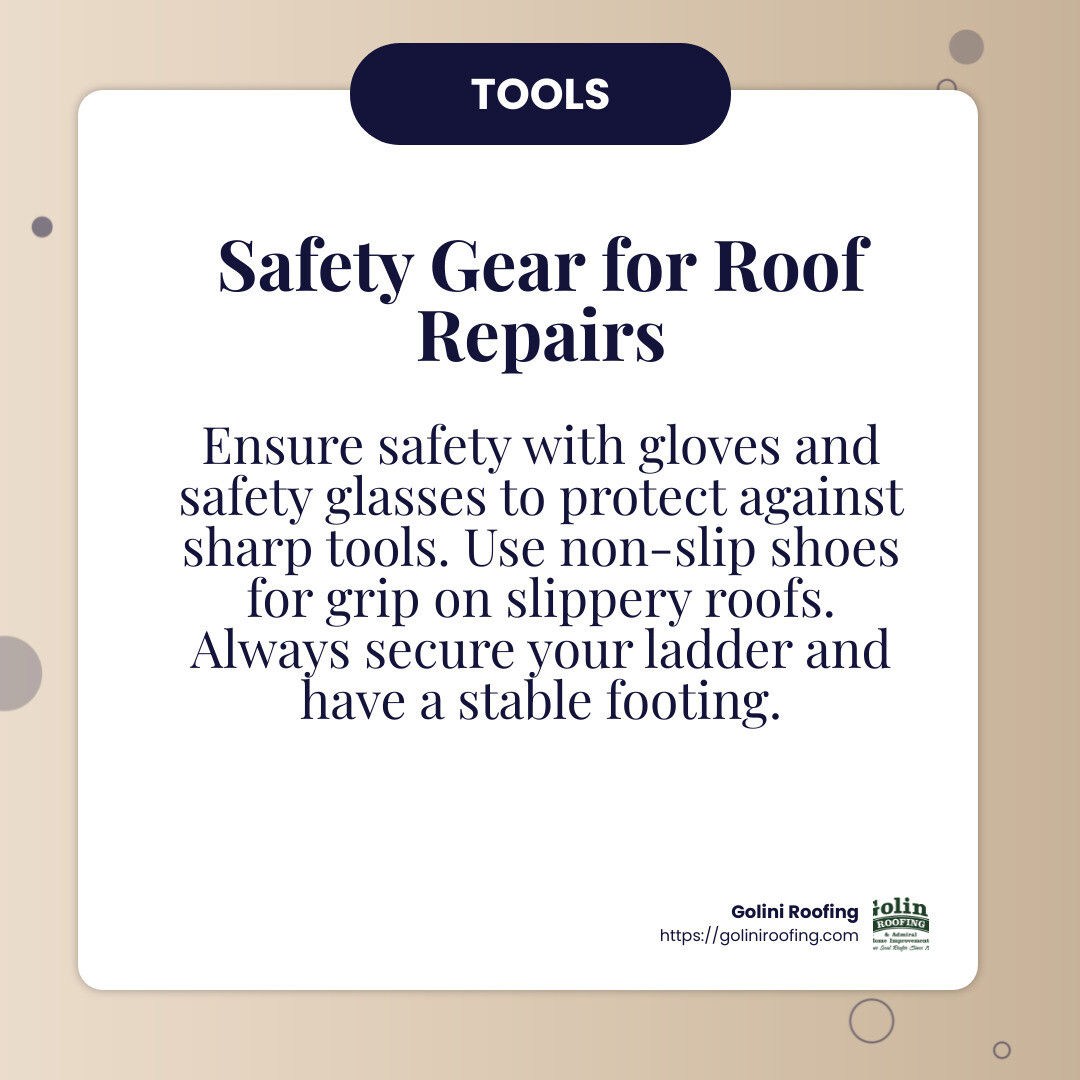
Safety Gear
- Gloves and Safety Glasses: Protect your hands and eyes from sharp tools and flying debris.
- Non-Slip Shoes: Essential for maintaining grip on potentially slippery roof surfaces.
Setting Up Your Workspace
Before you start, ensure your workspace is safe and organized. Check the weather forecast and choose a warm, dry day for your repairs. This will make shingles more pliable and adhesives more effective. Also, set up your ladder securely, and keep all tools within easy reach.
With the right tools and materials, you’re well-equipped to tackle shingle repairs effectively. Up next, we’ll guide you through the step-by-step process of replacing damaged shingles.
Step-by-Step Guide to Fix Roof Shingles
Now that you’re equipped with the right tools and materials, let’s dive into the process of fixing roof shingles. This guide will walk you through replacing damaged shingles, applying sealant, removing nails, and resealing to ensure your roof stays in top shape.
Shingle Replacement
- Identify the Damaged Shingle: Locate the shingle that needs replacing. Look for signs like curling, cracking, or missing granules.
- Break the Seal: Use a flat pry bar to gently lift the edges of the damaged shingle and the shingles above it. This breaks the seal created by the asphalt.
- Remove the Nails: Slide the pry bar under the shingle, close to each nail. Carefully lift the shingle and pry out the nails. Shingles are held by two rows of nails, so ensure all are removed.
- Take Out the Old Shingle: Once all nails are out, slide the damaged shingle free. Be cautious not to damage surrounding shingles.
- Install the New Shingle: Slide the replacement shingle into position, ensuring it aligns with the surrounding shingles. Secure it with roofing nails, placing them where the overlapping shingles will cover them.
Sealant Application
- Apply Roofing Sealant: Once the new shingle is in place, apply a small amount of roofing sealant under the tabs of the new shingle. This helps it adhere properly and improves its wind resistance.
Nail Removal and Resealing
- Nail Removal: As you replace shingles, make sure to remove any nails from the shingles above. This prevents any obstruction when sliding the new shingle into place.
- Resealing: After replacing the shingle, apply three small spots of asphalt plastic roof cement under the tabs of the new shingle. Press it flat to ensure a good seal. Also, reseal any surrounding shingles that had their sealant bond broken during the repair.
Final Check
- Inspect Your Work: Double-check that all shingles are securely fastened and sealed. Ensure there are no loose nails or gaps that could allow water to penetrate.
Following these steps, you can effectively fix roof shingles and protect your home from potential leaks and damage. A well-maintained roof not only looks great but also performs better against the elements.
Next, we’ll explore techniques for repairing specific shingle issues, like curling and cracking.
Techniques for Repairing Specific Shingle Issues
When it comes to fixing roof shingles, not all problems require a full replacement. Let’s look at how to handle some common shingle issues: curled shingles, cracked shingles, and torn shingles.
Curled Shingles
Curled shingles can happen due to aging or moisture. Fortunately, they can often be fixed without replacing them.
- Clean the Area: Remove any debris from the curled section to ensure a clean surface for repair.
- Apply Roofing Sealant: Lift the curled edge gently and apply a generous amount of roofing sealant underneath.
- Press and Secure: Press the shingle down firmly and place a brick or heavy object on top. Leave it for at least 24 hours to let the sealant dry completely.
Using this method, you can restore the shingle’s flat position and maintain your roof’s protective barrier.
Cracked Shingles
Cracks in shingles can allow water to seep through, so addressing them quickly is vital.
- Seal the Crack: Apply a thick bead of roofing sealant under the crack. Press the shingle down to spread the sealant evenly.
- Top Layer Sealant: Apply another bead of sealant on top of the crack. Use a putty knife to smooth it out.
- Blend with Granules: To make the repair less visible, sprinkle granules collected from your gutters over the wet sealant. This helps match the surrounding texture.
This quick fix can extend the life of cracked shingles and prevent water damage.
Torn Shingles
Torn shingles may seem daunting, but they can often be repaired without full replacement.
- Lift and Seal: Gently lift the torn section and apply roofing cement underneath.
- Align and Press: Align the torn edges and press them together firmly.
- Secure with Nail: If necessary, secure the shingle with a roofing nail, ensuring it’s covered by the overlapping shingle.
- Seal the Edges: Apply roofing cement along the tear and press it flat to ensure a good seal.
By following these steps, you can effectively repair torn shingles, saving time and resources.
These techniques help you tackle common shingle issues efficiently. Regular maintenance and prompt repairs will keep your roof in good shape and extend its lifespan.
In the next section, we’ll dive into preventative maintenance strategies to ensure your shingles last as long as possible.
Preventative Maintenance for Shingle Longevity
To keep your roof in top shape, regular maintenance is key. By catching small issues early, you can prevent big problems down the road. Here’s how to ensure your shingles last as long as possible:
Regular Inspections
Check your roof at least twice a year, ideally in spring and fall. Look for signs of damage like missing or cracked shingles, as well as any wear and tear. Spring inspections help spot winter damage, while fall checks prepare your roof for colder months.
Debris Removal
Leaves, branches, and dirt can accumulate on your roof and in your gutters. This debris traps moisture, which can lead to mold and rot. Regularly remove debris to keep your roof clean and dry.
Drainage Check
Ensure your gutters and downspouts are clear and functioning properly. Clogged gutters can cause water to back up, leading to leaks and water damage. Regularly clean and inspect your drainage system to prevent these issues.
Seasonal Maintenance
Different seasons bring different challenges:
- Winter: Make sure snow and ice don’t accumulate excessively to prevent ice dams.
- Summer: Look for signs of heat damage or sun wear on your shingles.
Professional Inspections
Even with regular DIY checks, it’s wise to have a professional inspect your roof every few years. They can spot issues that are easy to miss and advise on preventative measures.
By following these preventative maintenance tips, you’ll extend the life of your roof and keep it in excellent condition. Regular care ensures your shingles continue to protect your home effectively.
Next, we’ll address some frequently asked questions about fixing roof shingles.
Frequently Asked Questions about Fixing Roof Shingles
Can shingles on a roof be repaired?
Absolutely! Shingles can often be repaired, especially if the damage is minor. For instance, if you notice a few shingles with small cracks or slight curling, these can usually be fixed without replacing the entire roof. Applying roofing cement or sealant can temporarily fix small cracks and help curled shingles lay flat. However, it’s crucial to address these issues promptly to prevent more serious problems.
Can you replace just a few shingles?
Yes, you can replace just a few shingles if the damage is localized. This is a cost-effective solution for minor damage, like a few missing or severely damaged shingles. Replacing only the affected shingles can save you money and extend the life of your roof. However, ensure that the new shingles match your existing ones in color and style for a seamless look. It’s also important to check for any underlying issues that might have caused the damage, such as improper installation or ventilation problems.
What is the most common problem with roof shingles?
One of the most common problems with roof shingles is blistering. Blistering occurs when moisture gets trapped under the shingle surface, often due to excessive heat or poor ventilation. As the moisture heats up, it creates bubbles or blisters on the shingles. Over time, these blisters can pop, leading to further damage and potential leaks.
Another frequent issue is damage from moisture and heat. Moisture can cause shingles to deteriorate, leading to rot and mold growth. Meanwhile, prolonged exposure to high temperatures can cause shingles to become brittle and crack. Regular maintenance and inspections can help catch these problems early, ensuring your roof remains in good condition.
By understanding these common issues and solutions, you can better maintain your roof and address problems before they escalate. Next, we’ll explore the benefits of hiring a professional for your roof repair needs.
Conclusion
When it comes to maintaining the health of your roof, professional repair is often the best route. While DIY fixes can be effective for minor issues, they may not address underlying problems. Hiring experts ensures that your roof is repaired thoroughly and correctly.
At Golini Roofing, we pride ourselves on our commitment to customer satisfaction. With over 35 years of experience, our team in Wakefield, MA, and surrounding areas like Burlington and Reading, knows how to handle any roofing challenge. We use meticulous hand-nailing techniques to ensure each shingle is securely in place, providing you with a durable and high-quality roof.
Choosing Golini Roofing means choosing peace of mind. Our professional services are designed to extend the life of your roof and prevent future issues. We understand the importance of a well-maintained roof in protecting your home and your family.
If you’re facing roofing issues or simply want to ensure your roof is in top shape, consider reaching out to us. Our experts are ready to assess your needs and provide the best solutions custom to your specific situation.
Experience the Golini Roofing difference today. Contact us for a consultation, and let us help you keep your roof in excellent condition.
