
Shingle Roofing Process: Ultimate 2025 Guide
Understanding the Essential Steps of Shingle Installation
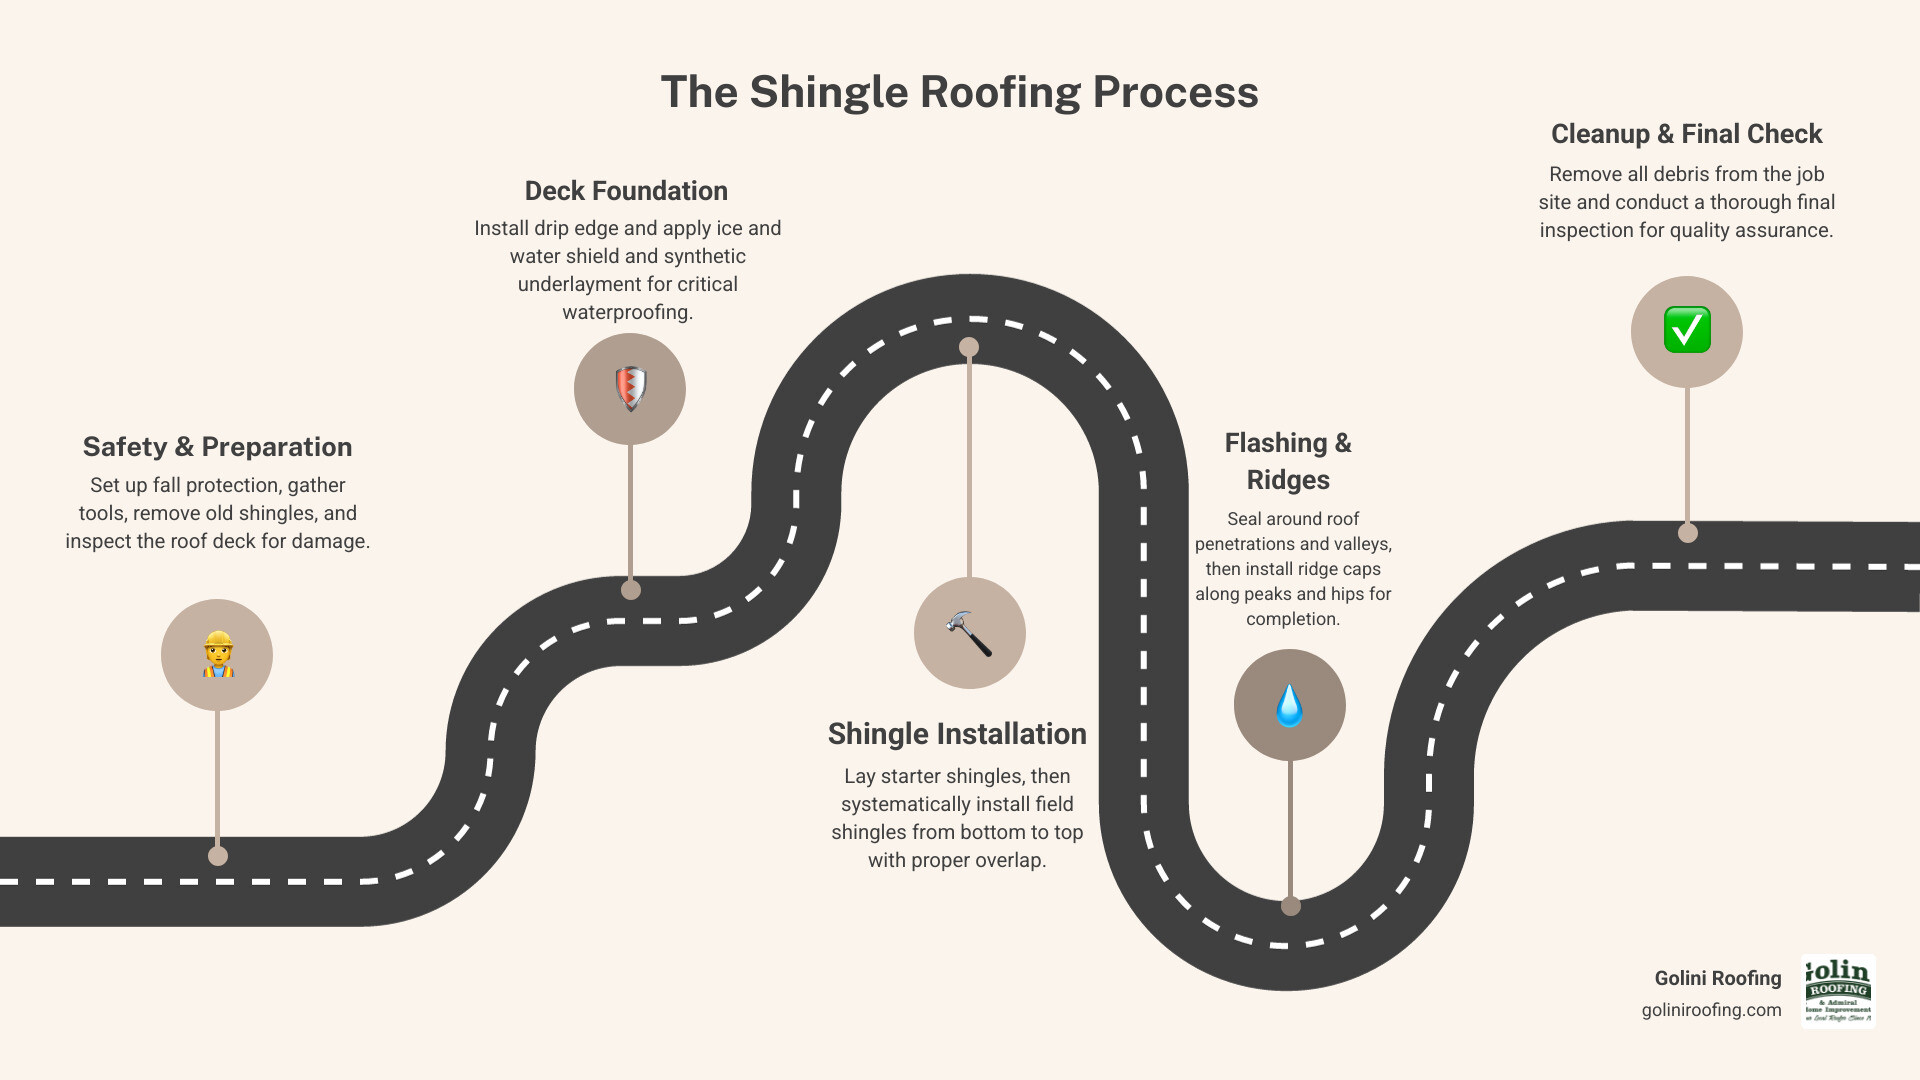
The shingle roofing process involves several critical steps that must be done in the correct order to ensure a watertight, durable roof. Here’s what the process entails:
Core Steps in Order:
- Safety preparation – Set up fall protection and gather proper tools
- Tear-off – Remove old shingles and inspect roof deck
- Deck preparation – Install drip edge and repair any damage
- Underlayment – Apply ice and water shield and synthetic underlayment
- Starter shingles – Install along eaves and rakes for proper sealing
- Field shingles – Lay courses from bottom to top with proper overlap
- Flashing – Seal around penetrations, valleys, and walls
- Ridge caps – Install final shingles along peaks and hips
- Cleanup – Remove all debris and conduct final inspection
Each step builds on the previous one, creating layers of protection against water. The principle is simple: gravity sheds water downward, so proper overlapping of materials is essential.
As someone who has guided homeowners through the shingle roofing process for over 35 years, I’m Jack Golini, owner of Golini Roofing in Wakefield, MA. My experience has taught me that attention to detail in each phase makes the difference between a roof that lasts for decades and one that fails prematurely.
Similar topics to shingle roofing process:
Before You Begin: Preparation, Inspection, and Safety
Before we even think about laying a single shingle, thorough preparation, inspection, and, most importantly, safety are paramount. Think of it as preparing your canvas before painting a masterpiece – a solid foundation ensures a beautiful and lasting result.
Crucial Safety Precautions
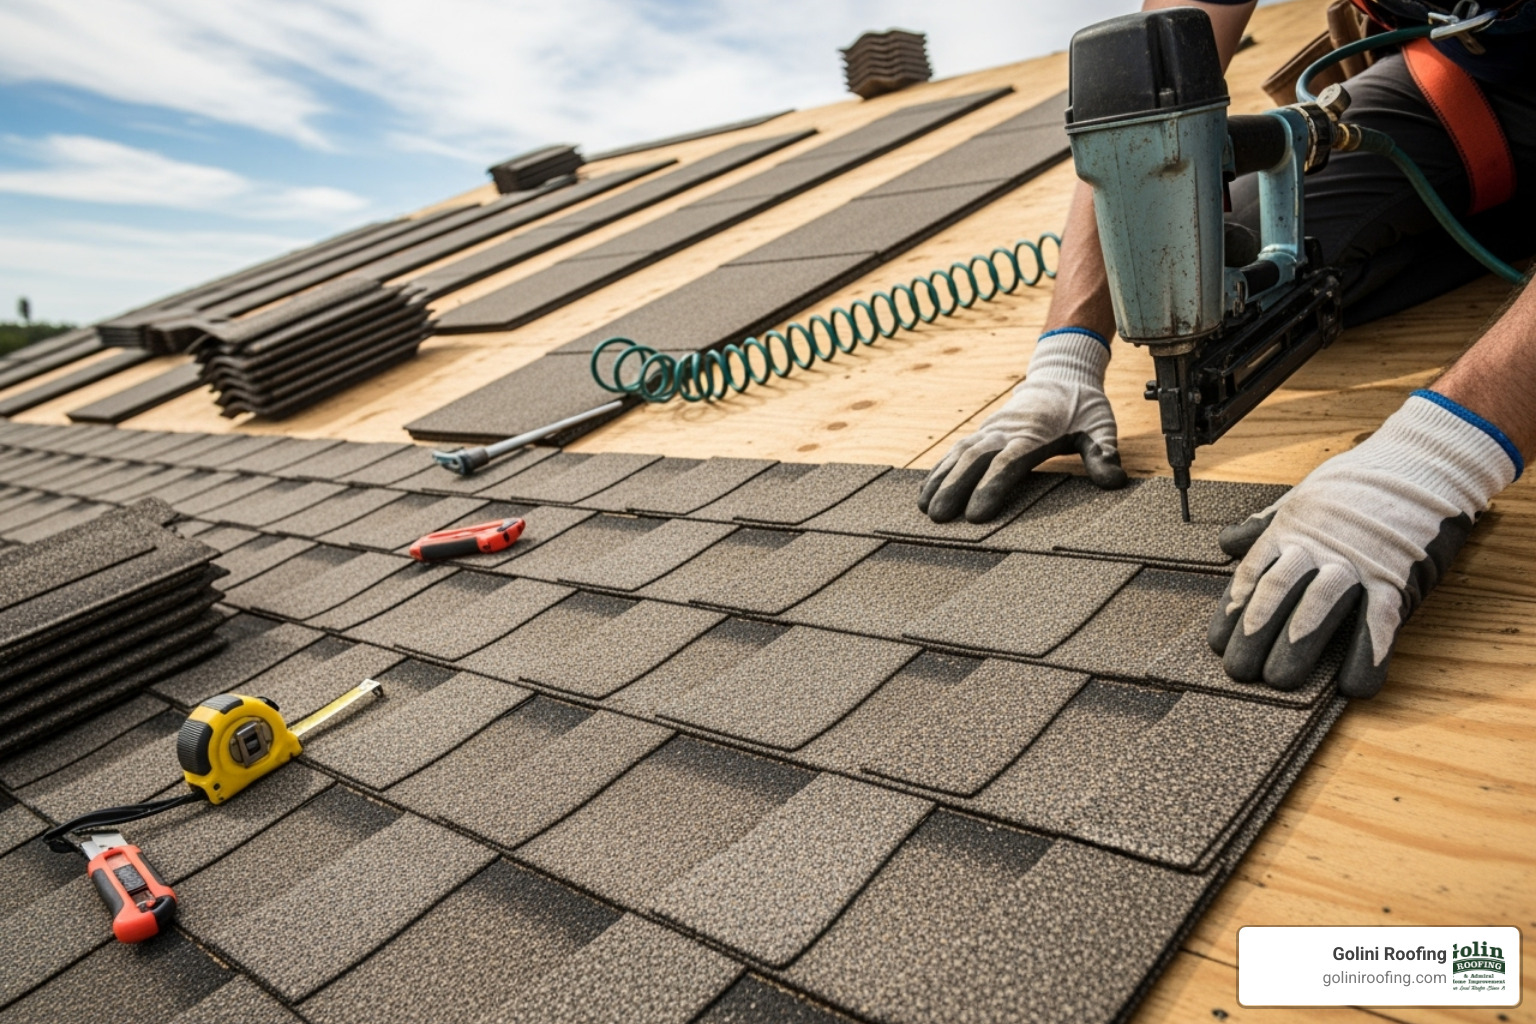
Safety is always the first step in any roofing project. Working at heights comes with inherent risks, and we can’t stress enough the importance of personal protective equipment (PPE) and proper safety protocols.
Here’s what we always ensure:
- Fall Protection: Using safety harnesses attached to roof anchors is non-negotiable.
- Ladder Safety: Ensure ladders are stable, level, and extend three feet above the roofline. Maintain three points of contact when climbing.
- Appropriate Gear: Wear rubber-soled shoes for grip, a hard hat, gloves, and safety glasses.
- Debris Management: Use tarps to protect landscaping and collect debris for a clean job site.
- Hazard Awareness: Be mindful of electrical lines and only work on dry roofs, avoiding rain, high winds, or extreme temperatures.
- Work with a Partner: Never work alone on a roof for safety and assistance in an emergency.
Signs Your Old Roof Needs Replacement
How do you know it’s time for a new roof, initiating the full shingle roofing process? Asphalt shingle roofs typically last between 20 to 30 years, but various factors can necessitate earlier replacement. We recommend a roof inspection to confirm.
Here are the tell-tale signs we look for:
- Roof Age: The roof is approaching or has exceeded its 20-30 year lifespan.
- Damaged Shingles: Shingles are visibly curled, cracked, or missing.
- Granule Loss: You find an accumulation of shingle granules in your gutters.
- Water Leaks: Stains appear on interior ceilings or walls, especially after rain.
- Sagging Roof Deck: The roof structure appears to be sagging or buckling.
- Moss or Algae Growth: Extensive growth can trap moisture and speed up shingle deterioration.
Estimating Shingles and Materials
Estimating materials accurately is crucial for efficiency and budgeting. It takes about three bundles of asphalt shingles to cover 100 sq. ft., which is known as one “square.”
Here’s a simplified estimation process:
- Measure Roof Area: Calculate the total square footage of all roof sections.
- Calculate “Squares”: Divide the total square footage by 100.
- Determine Shingle Bundles: Multiply the number of squares by three. We add 10-20% for waste and cuts, especially for complex roofs.
- Estimate Other Materials: Measure for ridge caps, drip edge, underlayment, and flashing.
Beyond shingles, a successful shingle roofing process requires these key items:
Essential Materials:
- Asphalt Shingles (field, starter, and ridge cap)
- Roofing Nails (typically 1-1/4-inch zinc-coated)
- Drip Edge Flashing
- Synthetic Underlayment and Ice & Water Barrier
- Flashing and Pipe Collars
- Roofing Cement/Sealant
Essential Tools for Shingle Installation:
- Roofing Nail Gun with Air Compressor
- Roofing Hammer, Utility Knife, Chalk Line, Tin Snips
- Pry Bar or Roofing Shovel
- Magnetic Sweeper, Caulking Gun, Ladder
- Safety Harness and Ropes
The Foundation: From Tear-Off to Underlayment
Once preparations are complete, we move to the foundational steps of the shingle roofing process: preparing the roof deck and installing critical protective layers.
Preparing the Roof Deck
A clean and solid roof deck is like a blank canvas, essential for the proper application of new shingles.
- Remove Old Materials: We remove all old shingles and materials down to the wood decking, starting from the ridge and working down.
- Pull Old Nails: We go over the entire deck to pull any remaining nails, which could puncture the new roof.
- Sweep Clean: The deck is swept clean of all debris.
- Inspect and Repair: We thoroughly inspect the decking (plywood or OSB) for rot or damage. Any compromised sections are replaced to create a solid, smooth surface for the new installation.
The Role of Underlayment and Leak Barriers
Underneath the visible shingles, there are vital layers of protection that contribute significantly to the roof’s waterproofing capabilities.
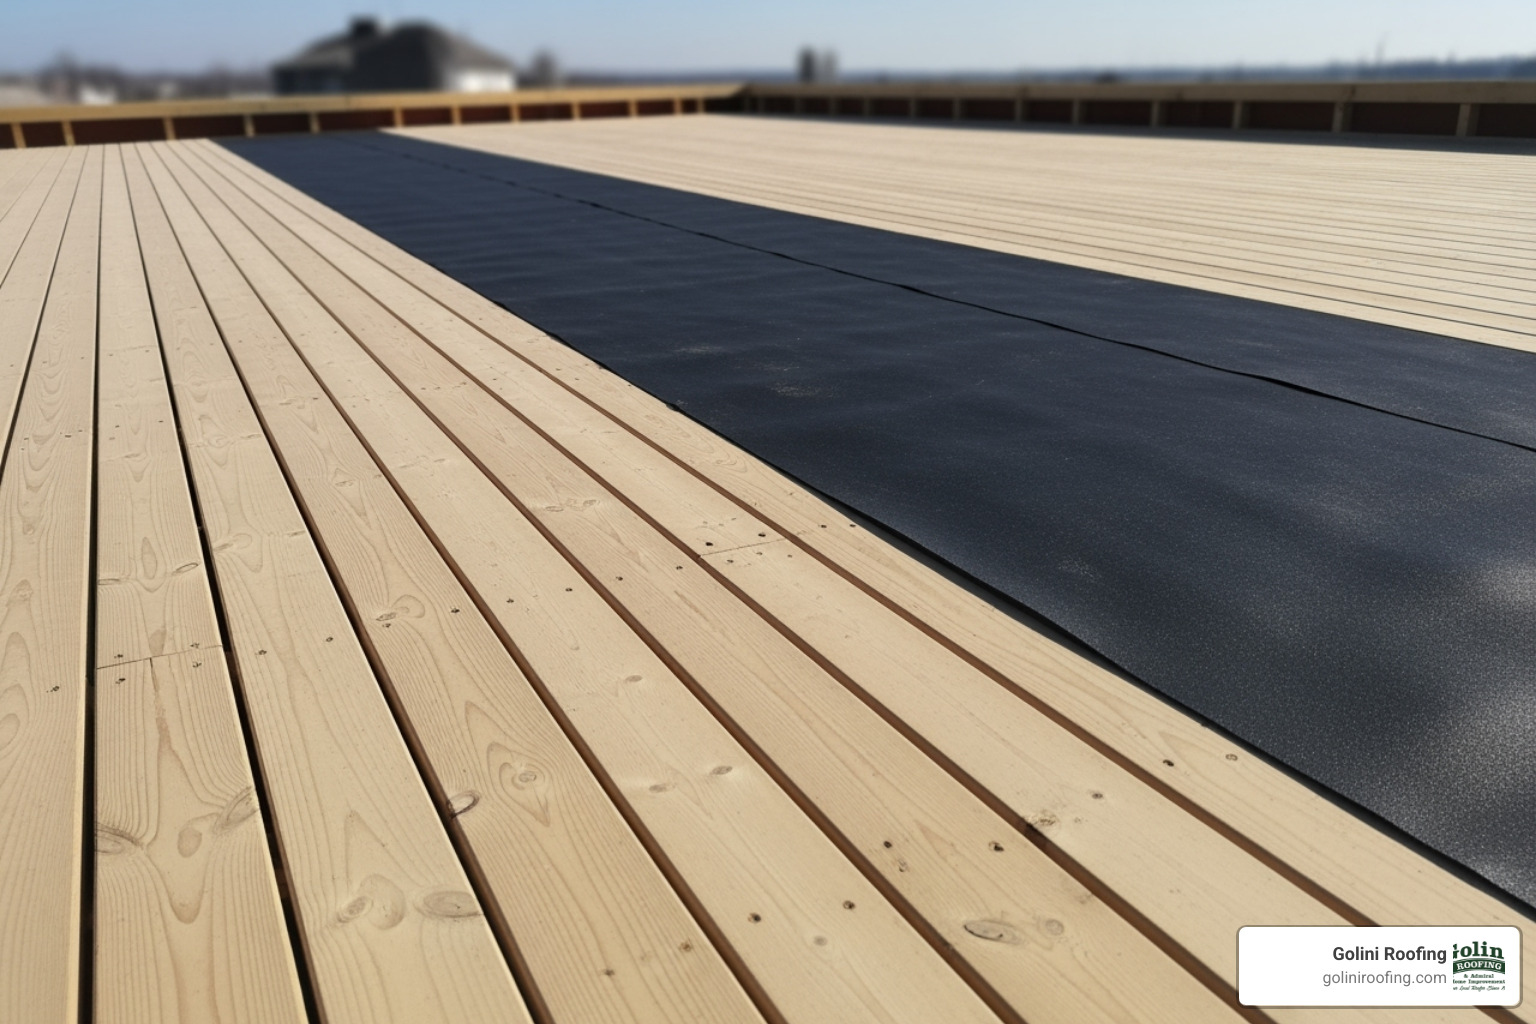
- Ice and Water Shield: This self-adhesive membrane is a critical leak barrier against ice dams and wind-driven rain. We install it along the eaves, in valleys, and around penetrations. It seals around nails to prevent water intrusion, and its use is often required for manufacturer warranties.
- Synthetic Underlayment: After the ice and water shield, the rest of the roof deck is covered with synthetic underlayment. This material provides superior secondary water resistance compared to traditional felt paper. We overlap each course from the bottom up to ensure water sheds properly.
- Drip Edge: This metal flashing is installed at the roof edges (eaves and rakes) to direct water into the gutters and protect the underlying wood. It is installed under the underlayment at the eaves and over it on the rakes.
Understanding these layers is key to a durable roof.
The Core Shingle Roofing Process
With the foundation laid, we move to the main event: installing the shingles themselves. This is where precision and proper technique are absolutely vital for performance and aesthetics.
Installing Starter Shingles
Starter shingles are not just for show; they are a critical component for proper shingle performance.
- Eave and Rake Edges: These specialized shingles are installed along the eaves (bottom edge) and rake (gable) edges of the roof.
- Sealant Adhesion: Starter shingles provide a continuous line of sealant that bonds with the first course of field shingles, enhancing their wind resistance and preventing wind uplift.
- Water-Shedding Protection: They also ensure proper water-shedding from the very first row, preventing water from seeping underneath the initial course.
- Proper Placement: We ensure they are perfectly aligned and overhang the drip edge by 1/2-inch to 3/4-inch to facilitate proper water runoff.
Laying Field Shingles: 3-Tab vs. Architectural
The majority of the roof surface is covered with “field” shingles. The type of shingle chosen impacts both the aesthetic and, to some extent, the installation method.
Key Differences Between 3-Tab and Architectural Shingles:
| Feature | 3-Tab Shingles | Architectural (Laminated) Shingles |
|---|---|---|
| Appearance | Flat, uniform, classic look | Dimensional, textured, often mimics wood shake or slate |
| Layers | Single layer, distinct cutouts (tabs) | Multiple, irregular layers bonded together |
| Durability | Good, but generally less wind-resistant | Excellent, thicker, more wind- and water-resistant |
| Lifespan | Typically 20-25 years | Often 30+ years, many come with lifetime limited warranties |
| Cost | More affordable | Higher upfront cost, but longer lasting |
| Weight | Lighter | Heavier |
| Installation | Can be installed using racking or stair-step | Must be installed using the stair-step method for best results |
Installation Methods: Racking vs. Stair-Step
- Stair-Step Method: This is the traditional and preferred method, especially for architectural shingles. We work across and up the roof, offsetting each course to ensure joints are staggered. This prevents leaks, creates an appealing pattern, and allows for proper color blending between bundles.
- Racking Method: This method involves installing shingles straight up the roof in columns. While faster, it is not recommended for architectural shingles as it can lead to improper nailing, stress cracks, poor color blending, and may void the manufacturer’s wind and sealing warranty.
We always follow manufacturer instructions diligently, as proper application is critical for both performance and warranty coverage. For residential roofing, we primarily use the traditional stair-step method to ensure the highest quality results.
For more information on our specific services, see our page on asphalt shingle roof installation.
Key Nailing Techniques in the Shingle Roofing Process
Proper nailing is a small detail that makes a huge difference in the longevity and wind resistance of your roof. As a company renowned for our meticulous hand-nailing of each shingle, we understand the importance of this step firsthand.
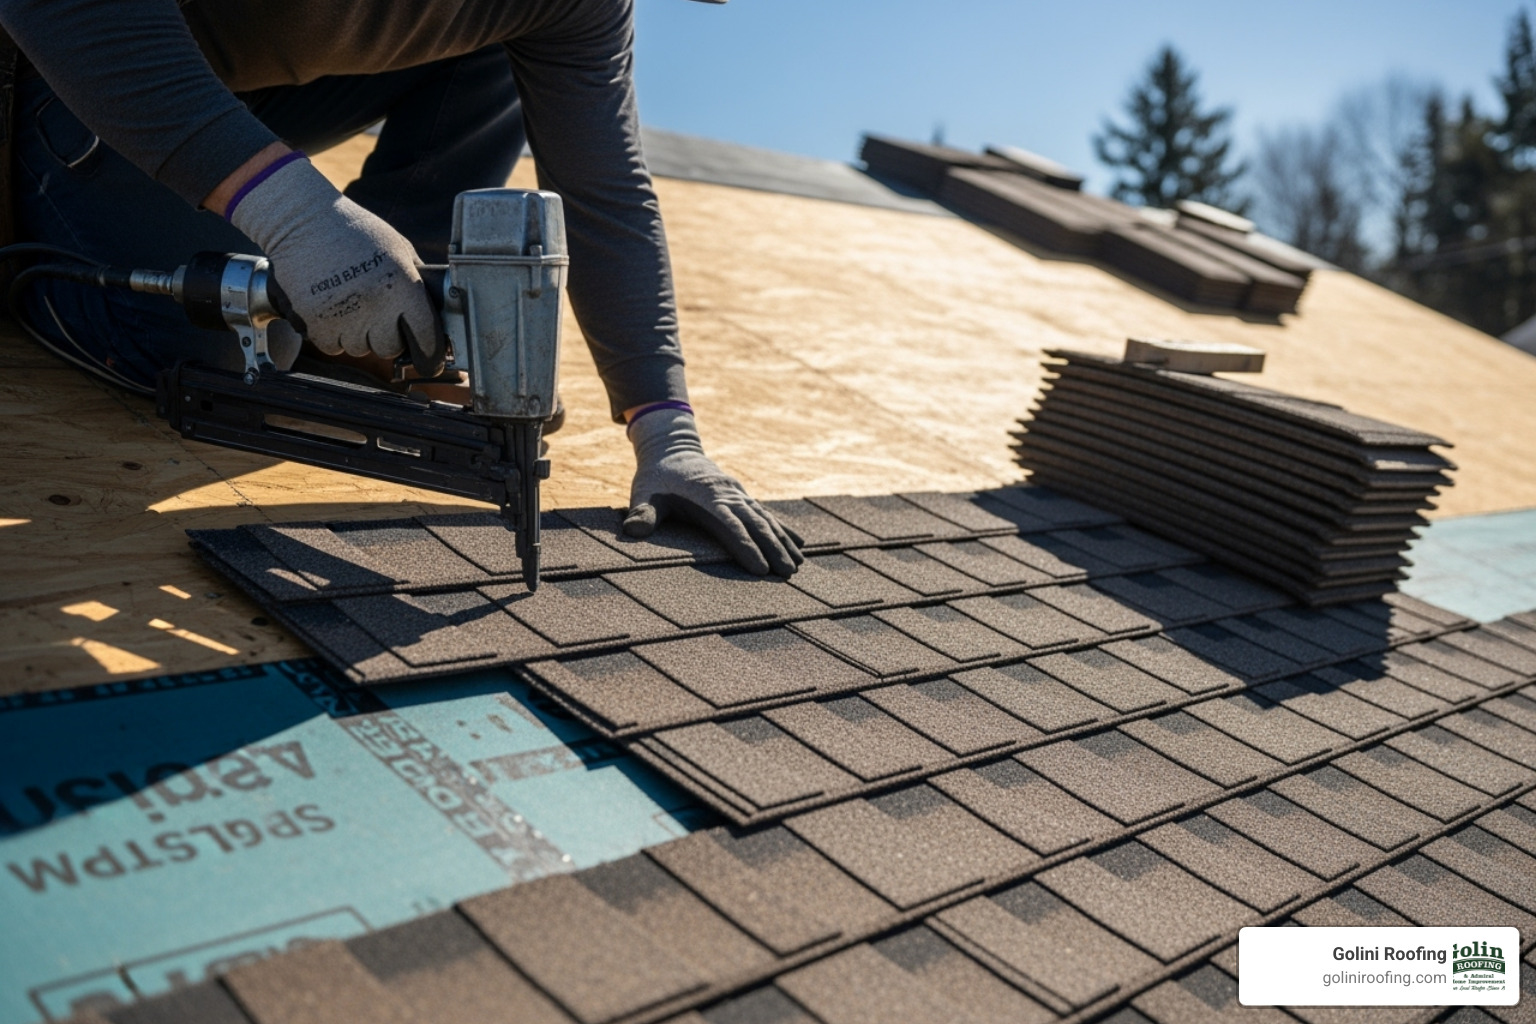
- Hand-Nailing Benefits: While nail guns are common, our preference for hand-nailing ensures precise control over nail placement and depth. This reduces the risk of over-driving or under-driving nails, creating a more durable and reliable roof.
- Nail Placement and Depth: Nails must be driven straight and flush with the shingle surface, never cutting into it. Proper placement is critical for wind resistance and warranty coverage. Each nail must fully penetrate the roof deck.
- Nailing Pattern: Most shingles require four nails. In high-wind areas, six nails per shingle are used for improved wind resistance, as specified by the manufacturer.
Finishing Touches: Flashing, Vents, and Ridges
The shingle roofing process isn’t complete until all vulnerable areas are properly sealed and the roof’s peak is covered. These “finishing touches” are crucial for preventing leaks.
How to Flash Roof Penetrations and Valleys
If a roof is going to leak, it will most likely be where the shingle layer is penetrated or meets a wall. This is where flashing provides critical protection.
- Roof Penetrations: For pipes, we use pre-formed collars or “boots” that fit snugly around the pipe and are integrated into the shingle layers. For vents and skylights, we install flashing and seal it carefully, cutting shingles to fit neatly around the penetration.
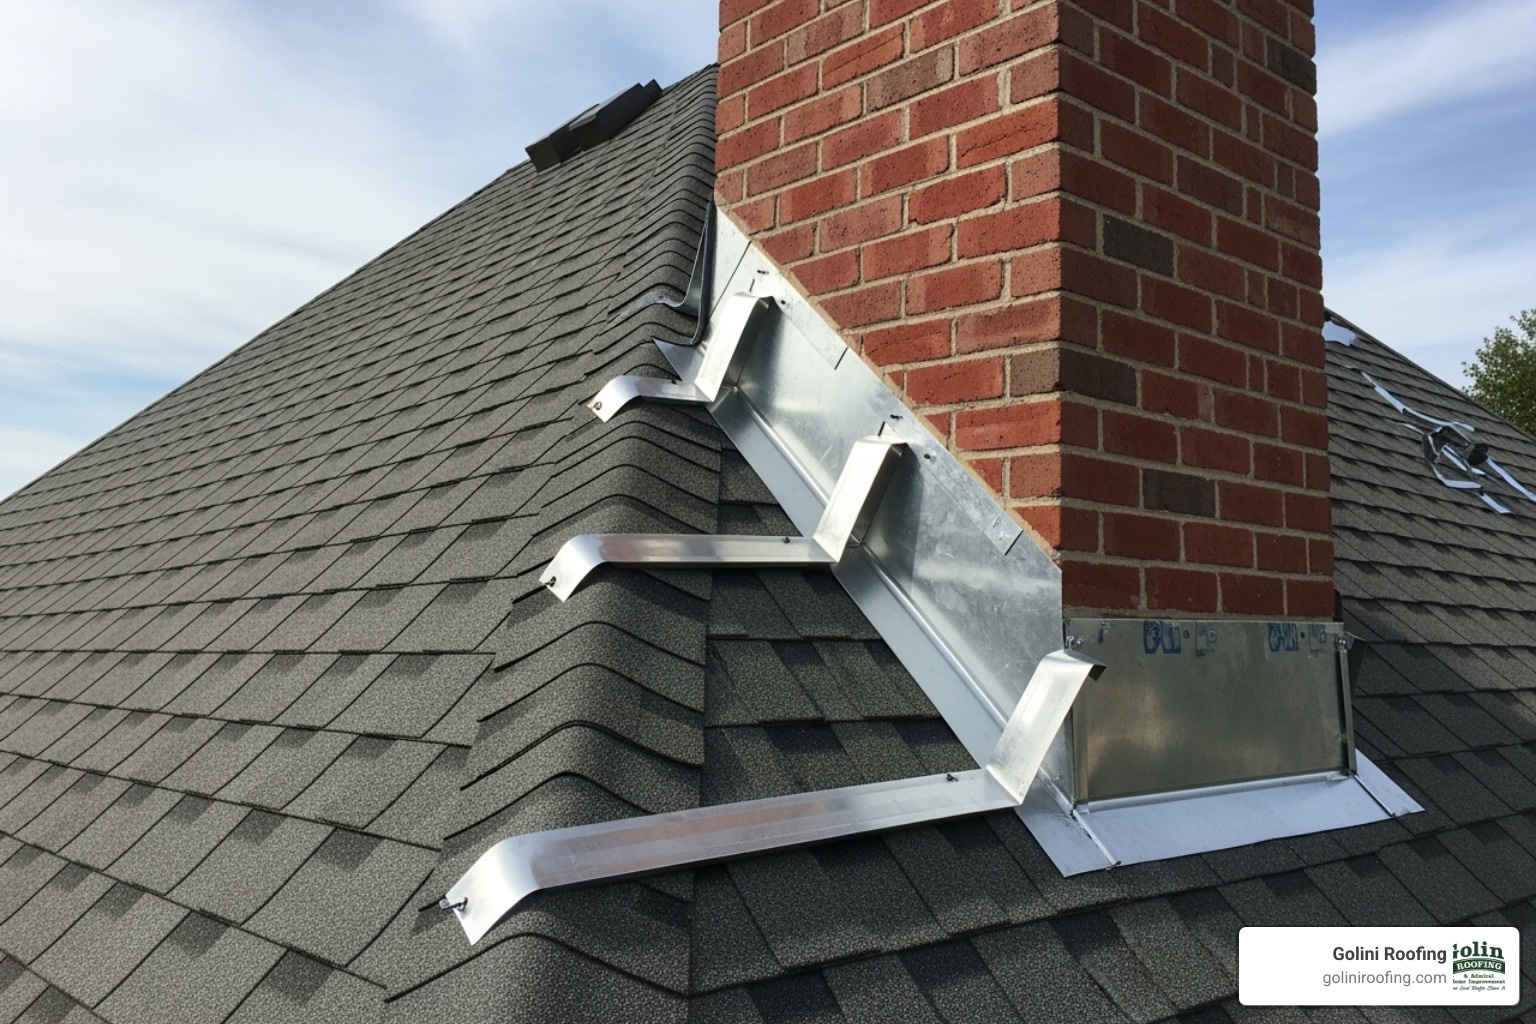
- Walls and Chimneys: Where a roof meets a vertical wall, we weave in L-shaped pieces of metal called step flashing with each shingle course. For chimneys, counter flashing is installed over the step flashing for an additional layer of protection.
- Valleys: Valleys channel a large amount of water. We always install an ice and water protector membrane in the valley first. We often recommend open valleys, which use a metal liner as the primary water-shedding surface. In a closed valley, shingles are woven across the valley. Both methods require precise installation to prevent leaks.
- For any roof repair needs related to flashing, we’re here to help.
Installing Ridge Cap Shingles
You’ve nailed in the last field shingle, and the finish line is in sight! The final step in the shingle roofing process is installing the hip and ridge caps.
- Covering the Peak: Ridge cap shingles are specially designed to cover the roof’s peak (ridge) and hips. They provide a finished look and protect the top-most course of shingles.
- Installation: We install them by overlapping each piece, working against the prevailing wind direction for maximum wind resistance. Longer nails are required to penetrate through the multiple layers and into the deck.
- Final Seal: The nails on the very last ridge cap are sealed with roofing cement to prevent any chance of leaks.
The Final Step: Cleanup and The DIY vs. Professional Decision
After all the hard work of the shingle roofing process, the job isn’t truly complete until the site is clean and a final inspection is performed. This is also where we consider the big question: DIY or professional?
Best Practices for Job Site Cleanup
A thorough cleanup is essential for both aesthetics and safety. We treat every job site as if it were our own home.
- Protecting Landscaping: Before starting, we protect sensitive areas like gardens, bushes, and air conditioning units with tarps.
- Debris Disposal: All old shingles, underlayment, and other debris are collected and disposed of in a dumpster.
- Removing All Fasteners: This is critical. We use powerful magnetic sweepers to go over the entire yard and driveway multiple times to pick up stray nails.
- Gutter Cleaning: Gutters are cleared of any shingle granules or debris that may have accumulated during the installation.
- Final Walk-Around: A comprehensive final inspection is conducted to ensure the work meets our high standards and that the property is left spotless.
For those considering replacing roof shingles, a professional cleanup is part of the package.
Advantages of Hiring a Professional Roofer
While learning how to shingle a roof might seem straightforward, a full replacement is a complex and dangerous job. We strongly recommend hiring a professional roofer for this project.
- Safety: Professionals have the training and equipment to work safely at heights, mitigating the significant risk of falls and injury.
- Expertise: Pros can handle complex roofs with multiple angles, valleys, or dormers, ensuring a watertight seal in these critical areas.
- Warranties: Reputable roofers provide a workmanship warranty, protecting you from installation errors. Our 35+ years of experience and meticulous hand-nailing ensure exceptional durability.
- Efficiency: A professional crew can often complete a roof in a day or two, minimizing disruption, whereas a DIY project can take much longer.
- Proper Materials and Tools: Professionals have access to high-quality materials and the right tools for a superior, long-lasting installation.
Frequently Asked Questions about the Shingle Roofing Process
We often get asked common questions about the shingle roofing process and the lifespan of new roofs. Here are some answers based on our experience and industry standards.
How long does a new asphalt shingle roof last?
A new asphalt shingle roof typically lasts 20 to 30 years. Longevity depends on the quality of the shingles, the quality of the installation, local climate, and proper attic ventilation. Regular maintenance, like keeping gutters clean, also helps extend a roof’s life.
What is the best temperature to install asphalt shingles?
The ideal temperature for installing asphalt shingles is between 40°F and 85°F (4°C and 29°C). In this range, shingles are flexible and their adhesive strips can properly seal with the sun’s warmth. In cold weather, shingles can become brittle and crack, while in very hot weather, they can be easily scuffed or damaged.
How much should shingles overhang the edge of the roof?
Shingles should overhang the drip edge at the eaves by 1/2-inch to 3/4-inch. This small detail is crucial for directing water into the gutters, protecting the fascia boards from rot, and preventing wind from getting under the shingles and causing uplift.
Trust the Experts with Your Shingle Roof Installation
The shingle roofing process is detailed and requires precision at every step to ensure a long-lasting, watertight result. From deck preparation to the final ridge cap, quality craftsmanship is key. As a local roofing company based in Wakefield, MA, serving Burlington, Lynnfield, North Reading, Reading, Stoneham, Wakefield, Wilmington, Winchester, and Woburn, we bring over 35 years of experience to every project. Our commitment to meticulous hand-nailing and exceptional customer satisfaction ensures your roof is built to last.
For a flawless installation backed by decades of experience, consider a professional service. Golini Roofing ensures every detail is handled with expert care. Learn more about our professional roof installation process.
Like us on Facebook!
