
Why Every Roofing Decision Starts With Knowing How to Calculate a Roof Pitch
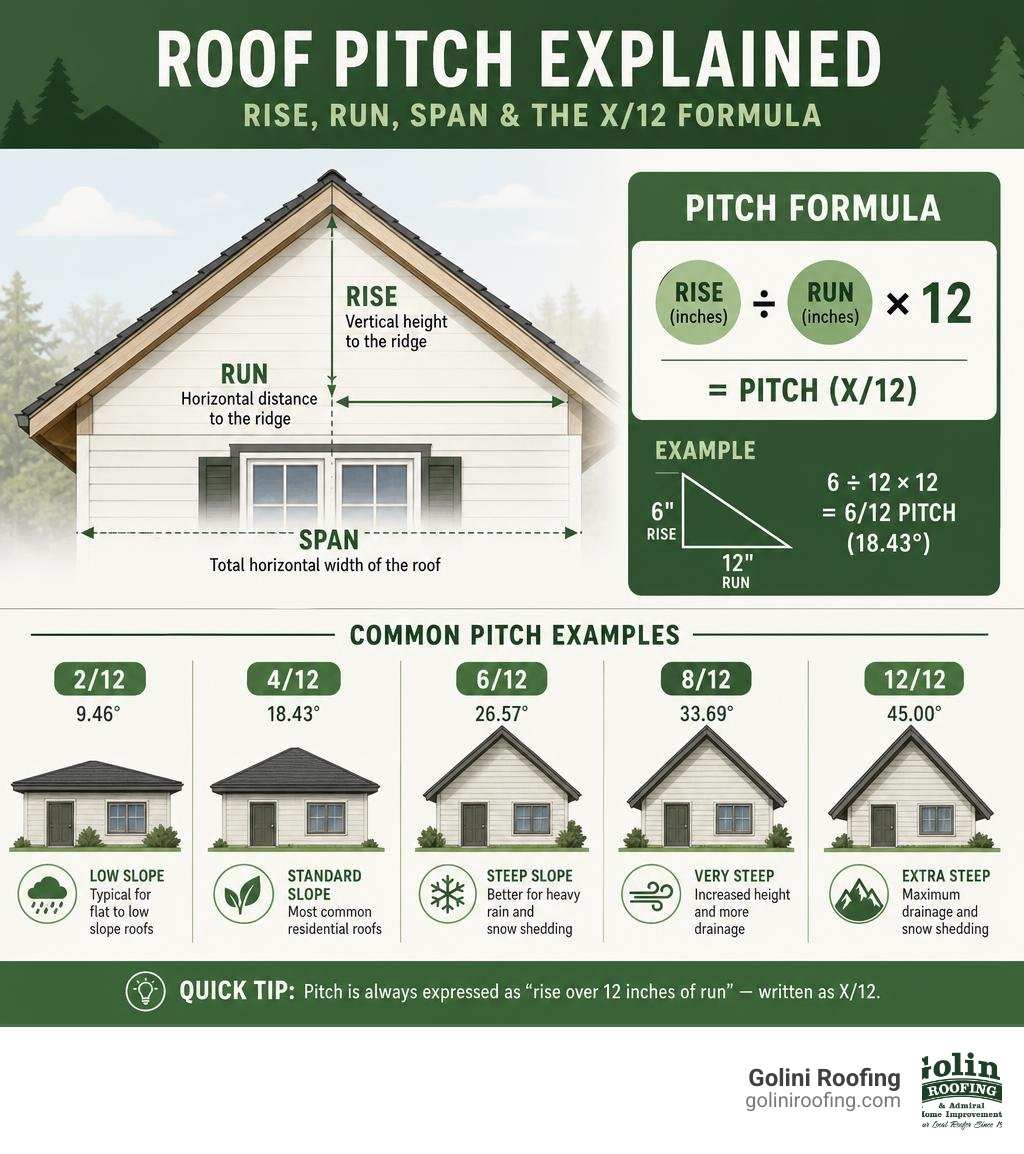
How to calculate a roof pitch in 3 steps:
- Measure the run — the horizontal distance from the outer wall to directly below the ridge (in inches)
- Measure the rise — the vertical height from the top of the wall to the peak of the ridge (in inches)
- Divide rise by run, then multiply by 12 — this gives you the pitch in X/12 format (e.g., a 6-inch rise over 12 inches of run = a 6/12 pitch)
Knowing how to calculate a roof pitch is the single most important measurement in any roofing project — yet it’s one of the most misunderstood.
Here’s why it matters: a roof’s pitch determines which materials can legally be installed on it, how well it sheds water and snow, and how much material you actually need to order. That last point surprises many homeowners. A steeply pitched roof on a 2,000 sq ft footprint can require up to 2,828 sq ft of actual roofing material — nearly 42% more than the floor plan suggests.
For homeowners in Massachusetts, this is especially relevant. New England’s winters bring heavy snow loads, and the steep gable roofs common across the North Shore — from Reading to Wakefield to Wilmington — aren’t just a style choice. They’re an engineering decision.
Roof pitch is the ratio of vertical rise to 12 inches of horizontal run, expressed as X/12. A 4/12 pitch rises 4 inches for every 12 inches of horizontal distance — forming an 18.43° angle.
Whether you’re planning a reroof, evaluating an inspection report, or trying to understand a contractor’s quote, pitch is the number that ties it all together.
I’m Jack Golini, owner of Golini Roofing in Wakefield, MA, and I’ve been helping homeowners calculate a roof pitch and choose the right materials for their homes since 1982 — over 40 years of hands-on experience across hundreds of North Shore roofs. In this guide, I’ll walk you through everything you need to know, from the basic formula to IRC code minimums and slope multipliers.
Terms related to calculate a roof pitch:
Understanding Roof Pitch, Slope, and Angle
In the roofing industry, you will often hear the terms “pitch,” “slope,” and “angle” used interchangeably on the job site. While they all describe the steepness of a roof plane, they represent distinct mathematical concepts. Understanding the subtle differences between them is essential for accurate project communication.
Pitch vs. Slope vs. Angle
- Slope is the steepness of the roof plane expressed as a ratio of vertical rise to horizontal run. In the United States, slope is almost always formatted as inches of rise per 12 inches of run (e.g., 4:12 or 4/12).
- Pitch is technically a fraction derived by dividing the vertical rise by the entire span of the building (the distance from wall to wall). For example, if a roof rises 8 feet over a 24-foot span, its pitch is 1/3 (8/24). While historical carpentry relied heavily on this “rise-over-span” definition, modern construction practices have largely consolidated the two terms. Today, residential tradespeople in Massachusetts use “pitch” to mean “slope” — the X:12 ratio. For a deeper dive into these technical distinctions, read The Ultimate Guide to Measuring Roof Slope and Pitch.
- Angle is the physical inclination of the roof plane measured in trigonometric degrees from the horizontal plane. A completely flat surface is 0°, while a vertical wall is 90°.
The X:12 Ratio System
The X:12 ratio system remains the standard in American residential construction. It is highly practical because it directly corresponds to the 12-inch blade of a standard framing square. A 6/12 pitch means that for every 12 inches of horizontal distance (run) the roof travels, it rises 6 inches vertically.
To convert this ratio into trigonometric degrees, you use the arctangent function. For a 4/12 pitch, the math works out as:
$$text{Angle} = arctanleft(frac{4}{12}right) approx 18.43^circ$$
If you are working on international designs or dealing with modern architectural drawings, you may also see slope expressed as a percentage. Percent slope is calculated by dividing the rise by the run and multiplying by 100. A 4/12 pitch translates to a 33.3% slope, while a steep 12/12 pitch (45°) represents a 100% slope. You can easily visualize these conversions and test different measurements using the Roof Pitch Calculator — Pitch, Angle & Slope | CalculateRoofPitch.
Step-by-Step: How to Calculate a Roof Pitch Safely

Any task that requires climbing onto a roof carries inherent risks. Before attempting to measure your roof’s steepness, keep safety as your absolute priority.
While learning how to calculate a roof pitch can help you understand your home’s architecture, we strongly advise against climbing onto a roof surface yourself. Professional roofers use specialized safety harnesses, fall-arrest systems, and specialized footwear to navigate these surfaces. If your home has a steep roof, or if you suspect structural damage, please do not walk on it. Instead, contact us for a professional roof evaluation. We safely measure and inspect roofs daily in Wakefield, Ipswich, and Boxford.
If you must estimate your pitch, the safest and most accurate way to do so is from the safety of the ground or from inside your unfinished attic.
Using the Rise and Run Formula to Calculate a Roof Pitch
To mathematically determine your roof’s pitch, you need to find the vertical rise and the horizontal run. The basic formula is:
$$text{Pitch} = left(frac{text{Rise}}{text{Run}}right) times 12$$
Let’s look at a practical example. Suppose you measure a section of your roof (or a rafter inside your attic) and find a vertical rise of 15 inches over a horizontal run of 30 inches.
- Divide the rise by the run: $15 div 30 = 0.5$
- Multiply by 12: $0.5 times 12 = 6$
- Your roof pitch is 6/12 (which is a $26.57^circ$ angle).
For more detailed step-by-step mathematical breakdowns, check out our articles on How to Figure Roof Pitch and How to Calculate Roof Pitch in Minutes.
Measuring Pitch with a Level, Speed Square, or Smartphone
There are three highly reliable field methods for capturing these measurements without stepping foot on a ladder:
Method 1: The Attic Level and Tape Measure Method (Safest DIY Method)
Measuring from inside an unfinished attic is highly accurate because you are working directly with the exposed wood rafters.
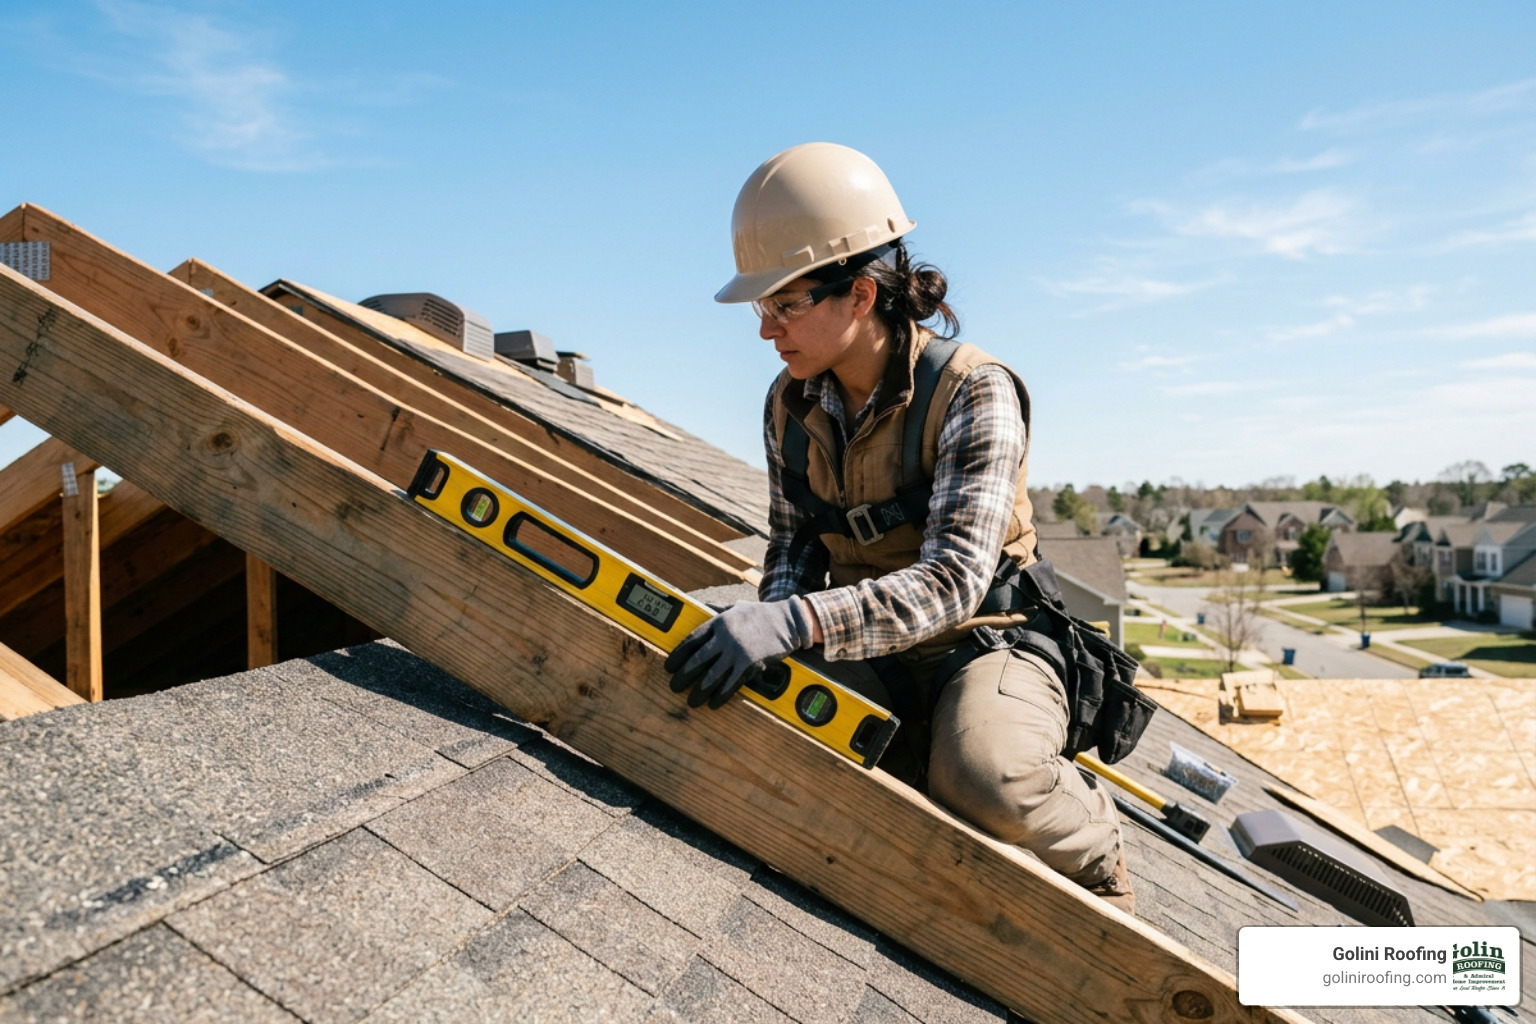
- Take a standard 12-inch carpenter’s level (or mark exactly 12 inches on a longer level).
- Place one end of the level flat against the underside of an attic rafter.
- Hold the level perfectly horizontal until the bubble is centered.
- Using a tape measure, measure vertically from the 12-inch mark on your level straight down to the top edge of the rafter.
- The vertical measurement in inches is your rise. If it measures 5 inches, you have a 5/12 pitch.
Method 2: The Speed Square Method
If you have access to a rake board or an exposed rafter tail outside:
- Align the pivot point of your speed square against the bottom edge of the rafter.
- Let a plumb bob or a weighted string hang freely from the pivot point, or align the square’s flat edge with a level line.
- Read the pitch marking directly where the plumb line crosses the square’s integrated “common rafter” scale.
Method 3: Smartphone Inclinometer Apps
Modern smartphones contain highly accurate gyroscopic sensors.
- Download a reliable, free pitch gauge or digital inclinometer app.
- Calibrate the device on a known flat, level surface (like a kitchen counter).
- Access your attic and place the long edge of your phone directly against the underside of a rafter.
- The app will display the slope in degrees or X:12 format. If you need to verify or convert these digital readings, you can use the Roof Pitch Gauge Calculator.
Minimum Roof Pitch Requirements by Material (IRC R905)
Your roof’s pitch dictates the type of roofing materials you can safely and legally install. The International Residential Code (IRC) Section R905 establishes strict minimum slope requirements to prevent water intrusion, pooling, and premature material failure.
In Massachusetts, local building inspectors in cities like Beverly and Melrose strictly enforce these guidelines during building permit inspections.
| Roofing Material | Minimum Allowed Pitch (IRC R905) | Special Installation Conditions / Requirements |
|---|---|---|
| Asphalt Shingles | 2/12 ($9.46^circ$) | Requires double-layer underlayment or full self-adhering ice-and-water barrier for pitches between 2/12 and 4/12. Standard underlayment allowed at 4/12 and above. |
| Standing Seam Metal | 1/4:12 ($1.19^circ$) | Requires lap sealant or specific high-temperature self-adhering underlayment depending on the manufacturer’s specification. |
| Clay & Concrete Tile | 2.5/12 ($11.77^circ$) | Double underlayment required for slopes below 4/12. Standard single underlayment allowed at 4/12 and above. |
| Wood Shingles & Shakes | 3/12 ($14.04^circ$) | Wood shakes require a minimum of 4/12. Wood shingles can go down to 3/12 with specific weatherproofing underlayment. |
| Low-Slope Membranes (TPO, EPDM, Mod-Bit) | 1/4:12 ($1.19^circ$) | Must be sloped sufficiently to prevent ponding water. Completely flat (0/12) is never permitted. |
Installing asphalt shingles on a roof pitch below 2/12 is a direct violation of building code and a guaranteed recipe for leaks. Water cannot shed quickly enough on low slopes, causing it to back up under the shingles via capillary action. For flat or low-slope additions, a continuous membrane system like rubber (EPDM) or TPO is required to create a monolithic, watertight seal.
The Role of Slope Multipliers in Estimating Roof Area
One of the most common mistakes in the roofing industry is ordering materials based solely on a home’s flat footprint (the horizontal plan-view area). Because a pitched roof rises into the air, its actual surface area is always larger than the flat ground footprint.
To determine the true surface area, professionals use a mathematical tool called a slope multiplier (or pitch correction factor). For a comprehensive breakdown of this concept, read The Ultimate Guide to Calculating Your Roof Square Footage and How Do You Measure the Square Footage of a Roof.
Why Professionals Calculate a Roof Pitch Before Ordering Materials
If you fail to account for the slope multiplier, you will severely under-order materials. In the roofing trade, materials are measured in “squares.” One roofing square equals 100 square feet of roof surface area.
Let’s look at how pitch dramatically changes material requirements for a home with a flat ground footprint of 2,000 square feet:
- At a 4/12 pitch (multiplier of 1.054), the actual roof area is: $$2,000 times 1.054 = 2,108 text{ sq ft (21.1 squares)}$$
- At an 8/12 pitch (multiplier of 1.202), the actual roof area is: $$2,000 times 1.202 = 2,404 text{ sq ft (24.0 squares)}$$
- At a steep 12/12 pitch (multiplier of 1.414), the actual roof area is: $$2,000 times 1.414 = 2,828 text{ sq ft (28.3 squares)}$$
Between a standard 4/12 roof and a steep 12/12 roof on the exact same house footprint, there is a difference of over 7 squares of shingles!
Additionally, professional estimators must add a “waste factor” (typically 10% to 15%) to account for shingle cuts along hips, valleys, and rakes. If you want to learn how to calculate these material quantities like a pro, read What is a Roofing Square in Measurement and follow the steps in How to Use Roofing Square Calculator in 5 Easy Steps.
How to Calculate Rafter Length Using Pitch Multipliers
Slope multipliers aren’t just for ordering shingles; they are also incredibly useful for framing. If you know your roof’s horizontal run and its pitch, you can instantly calculate the precise length of your rafters without climbing up to measure.
The mathematical formula for rafter length relies on the Pythagorean theorem ($a^2 + b^2 = c^2$), but the slope multiplier simplifies this into a single step:
$$text{Rafter Length} = text{Horizontal Run} times text{Slope Multiplier}$$
For example, if you are building an addition with a horizontal run of 12 feet and a roof pitch of 6/12 (which has a slope multiplier of 1.118): $$text{Rafter Length} = 12 times 1.118 = 13.416 text{ feet (approximately 13 feet, 5 inches)}$$
Note: When framing, always remember to adjust your final rafter length calculation by subtracting half the thickness of your ridge beam at the peak, and adding any planned overhang at the eaves. To run these numbers instantly, you can use the interactive Roof Pitch Calculator — Slope, Angle & Rafter Length.
The Cost and Structural Implications of Roof Pitch
A roof’s pitch does more than dictate aesthetics; it has a profound impact on construction costs, labor safety, and structural engineering.
Walkability and Safety Surcharges
The steepness of a roof directly affects how easily a crew can move across it.
- Easy Walkability (Up to 6/12): Roofs with a pitch of 6/12 ($26.5^circ$) or less are easily walkable. Crews can move around safely without specialized climbing gear, speeding up installation times.
- Extreme Caution (7/12 to 8/12): A 7/12 pitch is the transition zone. While some experienced roofers can walk it, OSHA regulations require strict fall protection.
- Non-Walkable (9/12 and Above): Roofs steeper than 8/12 are completely non-walkable. Crews must install roof jacks, scaffolding, and staging, and remain tied into safety harnesses at all times. Because of the increased safety risks and slower working speeds, roofing contractors charge a steep-slope labor surcharge.
Structural and Environmental Factors
- Snow Load Shedding: In Massachusetts, snow accumulation is a major structural concern. Roofs with a pitch of 6/12 or 7/12 allow heavy snow to slide off naturally, preventing structural overloading. Flat or low-pitched roofs retain snow, requiring heavier structural framing to support the weight.
- Wind Uplift: While steep roofs excel at shedding snow, they act like giant sails in high winds. Steep roofs experience significantly higher wind uplift forces during coastal storms, requiring extra fasteners and precise material installation.
Industry Cost Ranges
Because of the added materials, specialized safety staging, and labor intensity, steeper roofs cost more to replace.
According to general online data, the average cost of getting a roof pitched or replaced with asphalt shingles ranges from $6.38 to $22.15 per square foot, and metal or wood materials can range from $14.70 to $53.65 per square foot. Please note that these are average industry costs based on general internet data and do not represent the actual pricing of Golini Roofing. To understand how various factors impact your specific project costs, read Calculating Roof Replacement Cost.
Frequently Asked Questions About Roof Pitch
What is the most common roof pitch for residential homes?
In the United States, the standard residential pitch range is between 4/12 and 9/12. A 4/12 pitch is highly popular because it provides adequate water runoff for standard asphalt shingles while remaining safe and easy for crews to walk on during installation and maintenance.
What roof pitch is considered too steep to walk on safely?
Any roof pitch above 7/12 ($30.26^circ$) is considered non-walkable for standard roofing work. Walking on an 8/12 or steeper roof without proper fall-arrest systems, roof jacks, and harness equipment is extremely dangerous and a direct violation of OSHA safety standards.
Can you install asphalt shingles on a low-pitch roof?
Yes, but with strict limitations. The absolute minimum pitch for asphalt shingles is 2/12. If your roof pitch is between 2/12 and 4/12, the International Residential Code requires you to install a double layer of underlayment or a continuous self-adhering ice-and-water barrier before laying the shingles. For roofs below 2/12, shingles are not permitted, and you must use a continuous membrane system.
Conclusion
Calculating a roof pitch is the foundation of a successful, code-compliant, and leak-free roofing system. Whether you are managing snow loads in Wakefield or selecting the perfect architectural shingle for a home in Reading, understanding your roof’s steepness ensures you order the right amount of materials and stay within local building codes.
While measuring your pitch from your attic is a great way to understand your home’s design, climbing onto a roof is a job best left to the professionals. At Golini Roofing, we have been serving homeowners across Massachusetts for over 35 years. Our signature process includes meticulously hand-nailing every single shingle we install, ensuring unmatched wind resistance and durability that standard nail guns simply cannot match.
If you need your roof professionally measured, inspected, or replaced, we are here to help. Explore our Golini Roofing Services to learn more about our commitment to craftsmanship, or Contact Us for a Quote today.
Call Golini Roofing today at +781-246-0141 to schedule your professional roof inspection!
