
Why Knowing How to Figure Roofing Squares Saves You Time and Money
How do you figure roofing squares is one of the most common questions homeowners ask before starting a roof replacement — and for good reason. Get it wrong, and you’ll either run short on materials mid-job or waste money on shingles you don’t need.
Here’s the quick answer:
- Measure the length and width of each flat section (plane) of your roof
- Multiply length × width to get square footage for each plane
- Add all plane square footages together
- Multiply by your roof’s pitch factor (to account for slope)
- Divide the total by 100 — that number is your roofing squares
Example: A roof with 2,000 sq ft of surface area = 20 roofing squares
One roofing square equals exactly 100 square feet — think of a 10×10 foot area. Contractors, suppliers, and manufacturers all use this standard unit to price materials and labor.
Getting this number right matters more than most homeowners realize. A 2,200 sq ft home can easily have a 3,500 sq ft roof once you factor in slope and overhangs — that’s a difference of 13 squares, which can mean thousands of dollars in materials.
I’m Jack Golini, owner of Golini Roofing, and I’ve been helping homeowners in Wakefield, MA and surrounding communities figure out how do you figure roofing squares accurately since 1982. In over 35 years of hands-on roofing work, I’ve seen how a precise square count is the foundation of every successful, on-budget roofing project.
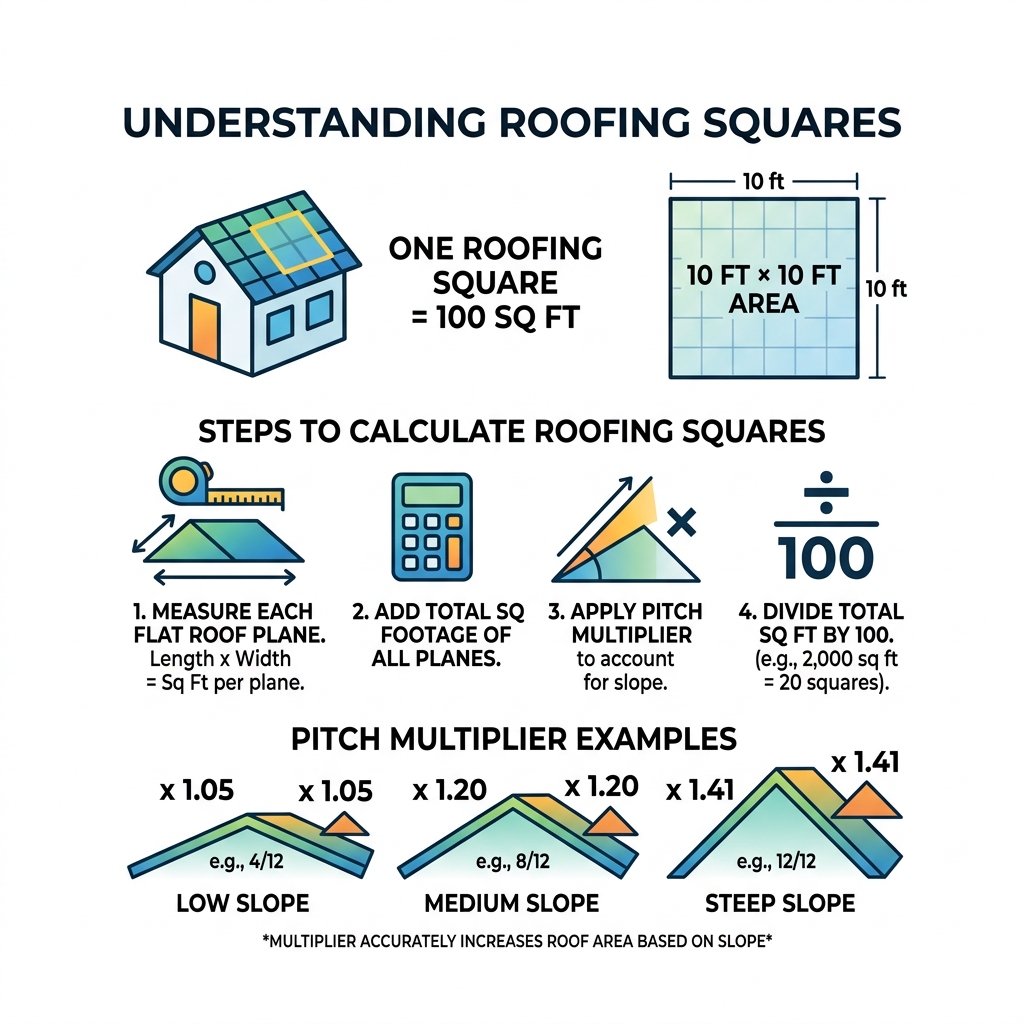
Quick how do you figure roofing squares terms:
Understanding the Roofing Square and Its Importance
When you first hear the term “square” in a roofing context, it’s easy to get confused. You might think we’re talking about a physical tool or perhaps just shorthand for a square foot. However, in the roofing industry, a roofing square is a specific unit of measurement equal to 100 square feet.
Imagine a 10-foot by 10-foot area on your roof. That block is one square. This standardization is vital because it creates a universal language between homeowners, contractors, and material suppliers. When we provide a quote for a home in Reading or Stoneham, we calculate the total surface area and then translate that into squares to determine exactly how much material to order.
Why We Use Squares instead of Square Feet
Using squares simplifies the math for large-scale projects. If we tell you your roof is 3,250 square feet, that’s a big number to juggle. If we say it’s 32.5 squares, it’s much easier to visualize and calculate.
Materials are almost always sold and measured by the square. This includes:
- Asphalt Shingles: Typically sold in bundles that cover 1/3 of a square.
- Underlayment: Rolls are often sized to cover a specific number of squares.
- Drip Edge and Starter Strips: While sold by the linear foot, the quantity needed is dictated by the total square count and perimeter.
- Labor Costs: Many contractors estimate labor at a rate per square, which can range anywhere from $150 to $300+ depending on the complexity (note: these are average internet-based ranges and not specific to our pricing).
Understanding how to measure a roofing square ensures that when you see a quote for “30 squares,” you know exactly what that means for your budget.
How Do You Figure Roofing Squares: A Step-by-Step Guide
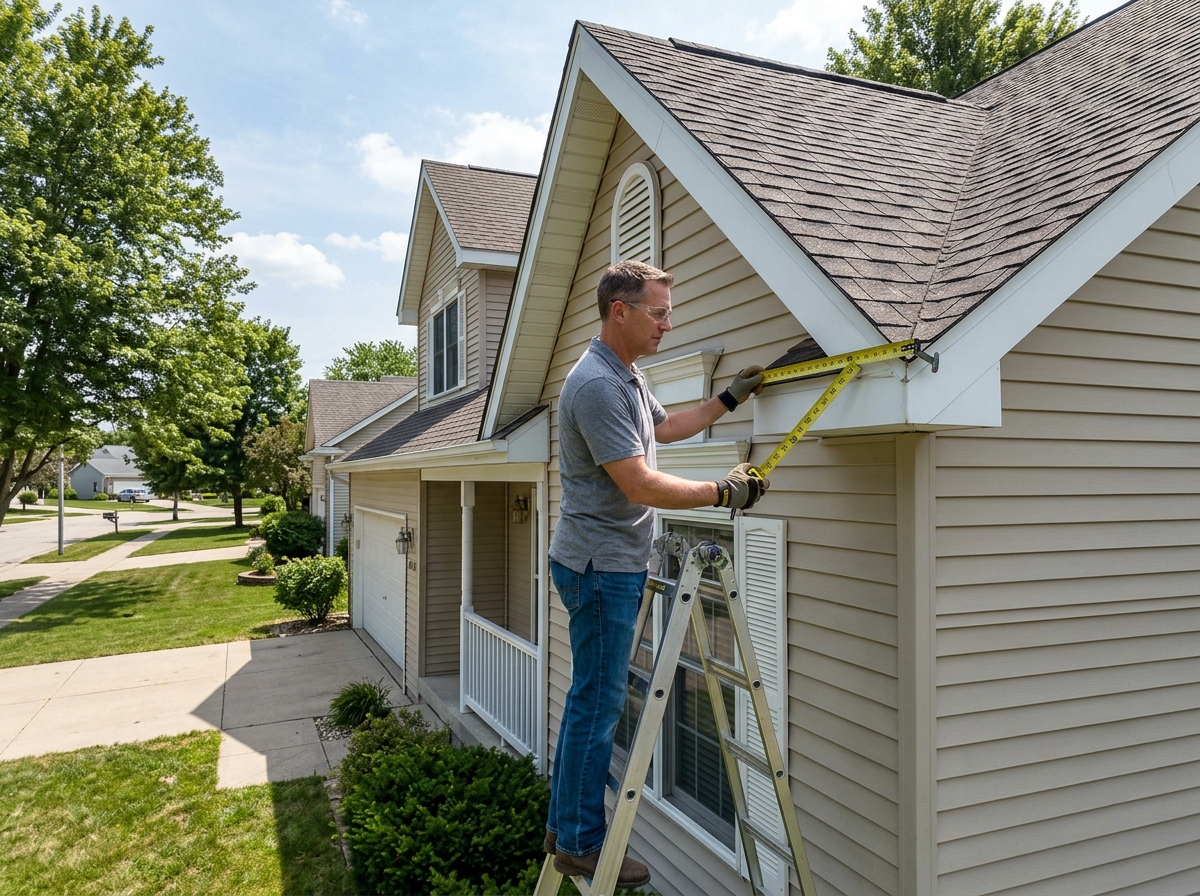
If you are feeling brave and want to do the math yourself, the process is straightforward but requires attention to detail. To measure the square footage of a roof, you need to break the structure down into its simplest parts.
Step 1: Divide the Roof into Planes
A roof is rarely one single flat surface. Most homes in Wakefield or Lynnfield have multiple “planes” or faces. A simple gable roof has two planes; a hip roof has four. Identify each individual rectangular or triangular section.
Step 2: Measure Length and Width
For each rectangular plane, measure the length and the width in feet.
- Length × Width = Square Footage
- Example: If one side of your roof is 35 feet long and 20 feet wide, that plane is 700 square feet.
Step 3: Sum the Totals
Add the square footage of every plane together. Let’s say you have four planes:
- Plane A: 600 sq ft
- Plane B: 600 sq ft
- Plane C: 400 sq ft
- Plane D: 400 sq ft
- Total: 2,000 sq ft
Step 4: Divide by 100
This is the easiest part. Take your total square footage and divide by 100 to find your “base squares.”
- 2,000 / 100 = 20 base squares.
Essential Measurement Tools
To do this accurately, you’ll need:
- A long tape measure (50-100 feet).
- A ladder (if you are comfortable and safe using one).
- A notepad and pen to sketch the roof layout.
- A calculator.
- A pitch gauge or a smartphone with a level app.
Accounting for Pitch, Waste, and Complex Features
Your “base squares” are a great starting point, but they aren’t the final number. Why? Because most measurements taken from the ground or a blueprint represent “flat” square footage. Since roofs are sloped, the actual surface area is larger than the footprint of the house. This is where figuring roof pitch becomes essential.
The Pitch Multiplier
Roof pitch is the “rise over run”—how many inches the roof rises vertically for every 12 inches it runs horizontally. A 4/12 pitch means the roof rises 4 inches for every foot of horizontal distance.
To get the true surface area, you multiply your base square footage by a “pitch multiplier” (also called a slope factor).
| Roof Pitch | Multiplier (Slope Factor) |
|---|---|
| 3/12 (Low) | 1.03 |
| 4/12 | 1.054 |
| 6/12 (Medium) | 1.12 |
| 8/12 | 1.20 |
| 12/12 (Steep) | 1.414 |
Example: If your 2,000 sq ft roof has a 6/12 pitch, you calculate: 2,000 × 1.12 = 2,240 sq ft. This brings your total to 22.4 squares.
Adding the Waste Factor
No roofing project uses exactly the amount of shingles measured. You have to cut shingles to fit valleys, hips, and rakes. There is also overlap to consider.
- Standard Waste: Add 10% to 15% for a standard roof.
- Complex Waste: For roofs with many dormers or valleys, add up to 20%.
For a 22.4 square roof, adding 15% waste (22.4 × 1.15) gives you a final order of roughly 25.76 squares. You should always round up to the nearest full square or bundle to ensure you don’t run out. You can also refer to a Roof Replacement Matrix for standardized estimation guides used by some municipalities.
How do you figure roofing squares for complex shapes?
When dealing with non-rectangular sections like those found on hip roofs or around dormers, the math gets a bit more “fun” (or frustrating, depending on your love for geometry).
- Triangles (Gables/Hips): Measure the base and the height. The area is (Base × Height) / 2.
- Dormers: Treat these as miniature roofs. Calculate their planes separately and add them to the total.
- Valleys and Ridges: While these don’t add much square footage themselves, they increase the waste factor significantly because of the precise cuts required.
Estimating Materials and Shingle Bundles
Once you have your final square count, it’s time to go shopping—or at least understand what your contractor is ordering. To estimate your roof shingles, you need to know how they are packaged.
The 3-Bundle Rule
For standard asphalt shingles, the industry standard is 3 bundles per square.
- If your project requires 26 squares, you will need 78 bundles of shingles (26 × 3).
However, always check the manufacturer’s packaging. Some specialty or heavy-duty shingles might come in 4 bundles per square. If you are ever unsure, you can check the coverage of a bundle of shingles specifically for the brand you’ve chosen.
Beyond the Shingles
Calculating squares also helps you estimate other critical components:
- Underlayment: Usually sold in rolls covering 4 or 10 squares.
- Drip Edge: Measured in linear feet along the eaves and rakes.
- Starter Strips: Also measured in linear feet along the edges.
- Nails: A standard rule of thumb is roughly 320 nails per square (using 4 nails per shingle).
At Golini Roofing, we take this a step further. Because we hand-nail every shingle, our material estimation must be spot-on to ensure our craftsmen have exactly what they need to maintain our high standards of durability.
Safety and Modern Measurement Alternatives
While measuring your own roof can be a satisfying DIY task, it isn’t without risks. Climbing ladders is inherently dangerous, especially on the steep pitches common in older homes in Winchester or Woburn.
Safety First
If you decide to measure yourself:
- Use a sturdy, level ladder.
- Never work alone.
- Wear slip-resistant shoes.
- Avoid measuring in wet or windy conditions.
- If the pitch is steep (above 6/12), stay off the roof and measure from the ground or a ladder.
Modern Alternatives
You don’t necessarily need to climb a ladder to figure out your square count anymore. Technology has made this much safer and often more accurate.
- Aerial Measurement Services: Companies use satellite imagery to provide highly detailed reports of your roof’s dimensions, pitch, and square footage.
- Smartphone Apps: Some apps allow you to take photos of your home from the ground, and their AI generates a 3D model with precise measurements.
- Drones: Many professional inspectors now use drones to capture high-resolution images of complex roofs without ever stepping onto a shingle.
How do you figure roofing squares using online tools?
If you have your basic dimensions, a roof square footage calculator can do the heavy lifting for you. You simply input your length, width, and pitch, and it will output the total squares and even suggest the number of bundles needed. These are excellent for quick estimates, though we always recommend a professional on-site measurement before signing a contract.
Frequently Asked Questions about Roofing Squares
How many bundles of shingles are in a square?
Standard asphalt shingles almost always come in 3 bundles per square. This means each bundle covers approximately 33.3 square feet. If you are using premium architectural shingles, verify with the manufacturer, as some may require 4 bundles to cover the same 100-square-foot area.
Is a roofing square the same as the house square footage?
No! This is a very common mistake. A 2,000-square-foot home refers to the living space inside. The roof must cover that space, plus the overhangs (eaves), and account for the slope. A 2,000-square-foot ranch-style home might actually have a 3,000-square-foot roof (30 squares).
Should I add extra material for waste on a simple roof?
Yes, absolutely. Even on a perfectly rectangular roof with no dormers, you will have waste from the starter course, the ridge caps, and shingles that are trimmed at the edges. A minimum of 10% waste is the industry standard for even the simplest projects.
Conclusion
Figuring out your roofing squares doesn’t have to be a mathematical nightmare. By breaking your roof down into planes, measuring carefully, and accounting for the pitch and waste, you can get a very accurate picture of your project’s scope.
Whether you’re in Wakefield, Burlington, or Wilmington, having this knowledge empowers you to have better conversations with your contractor and ensures your budget stays on track.
At Golini Roofing, we believe that transparency starts with accurate measurements. With over 35 years of experience serving our Massachusetts neighbors, we combine modern estimation techniques with old-school craftsmanship—like our signature hand-nailing process—to ensure your roof is built to last.
Ready for a precise estimate from a team you can trust? More info about our roofing services is just a click away. We’d be honored to help you protect your home for the next 30 years and beyond.
