
TPO Installation Process: Flawless 2025
Understanding the TPO Installation Process
The tpo installation process involves several critical steps that ensure a durable, watertight commercial roofing system. Here’s what the complete process looks like:
Essential TPO Installation Steps:
- Surface Preparation – Clean and inspect the roof deck, remove debris, and install insulation
- Membrane Placement – Roll out TPO sheets with proper 6-inch overlaps, starting from the low point
- Attachment Method – Either mechanically fasten with plates and fasteners or fully adhere with bonding adhesive
- Seam Welding – Heat weld all seams using robotic or hand welders at temperatures around 900°F
- Quality Control – Probe all seams after cooling to ensure watertight bonds
- Flashing Installation – Flash all penetrations, walls, and details with TPO membrane
- Final Inspection – Complete thorough quality check and cleanup
The key to successful TPO installation lies in proper preparation, precise welding techniques, and attention to detail. As senior commercial training specialists note: “From seam direction to welding robot heat calibration to countering wind resistance, proper TPO installation is an art and a science.”
Why TPO Installation Quality Matters
TPO roofing systems can last 15-30 years when installed correctly, but poor installation techniques can lead to premature failure, leaks, and costly repairs. The membrane’s thermoplastic properties allow for strong heat-welded seams that create a monolithic surface – but only when proper temperatures, speeds, and techniques are used.
I’m Jack Golini, and I’ve been installing commercial roofing systems since 1982, with experience in the tpo installation process for businesses throughout the North Shore area. My team and I have perfected these techniques over decades to ensure every TPO roof we install provides maximum durability and weather protection.
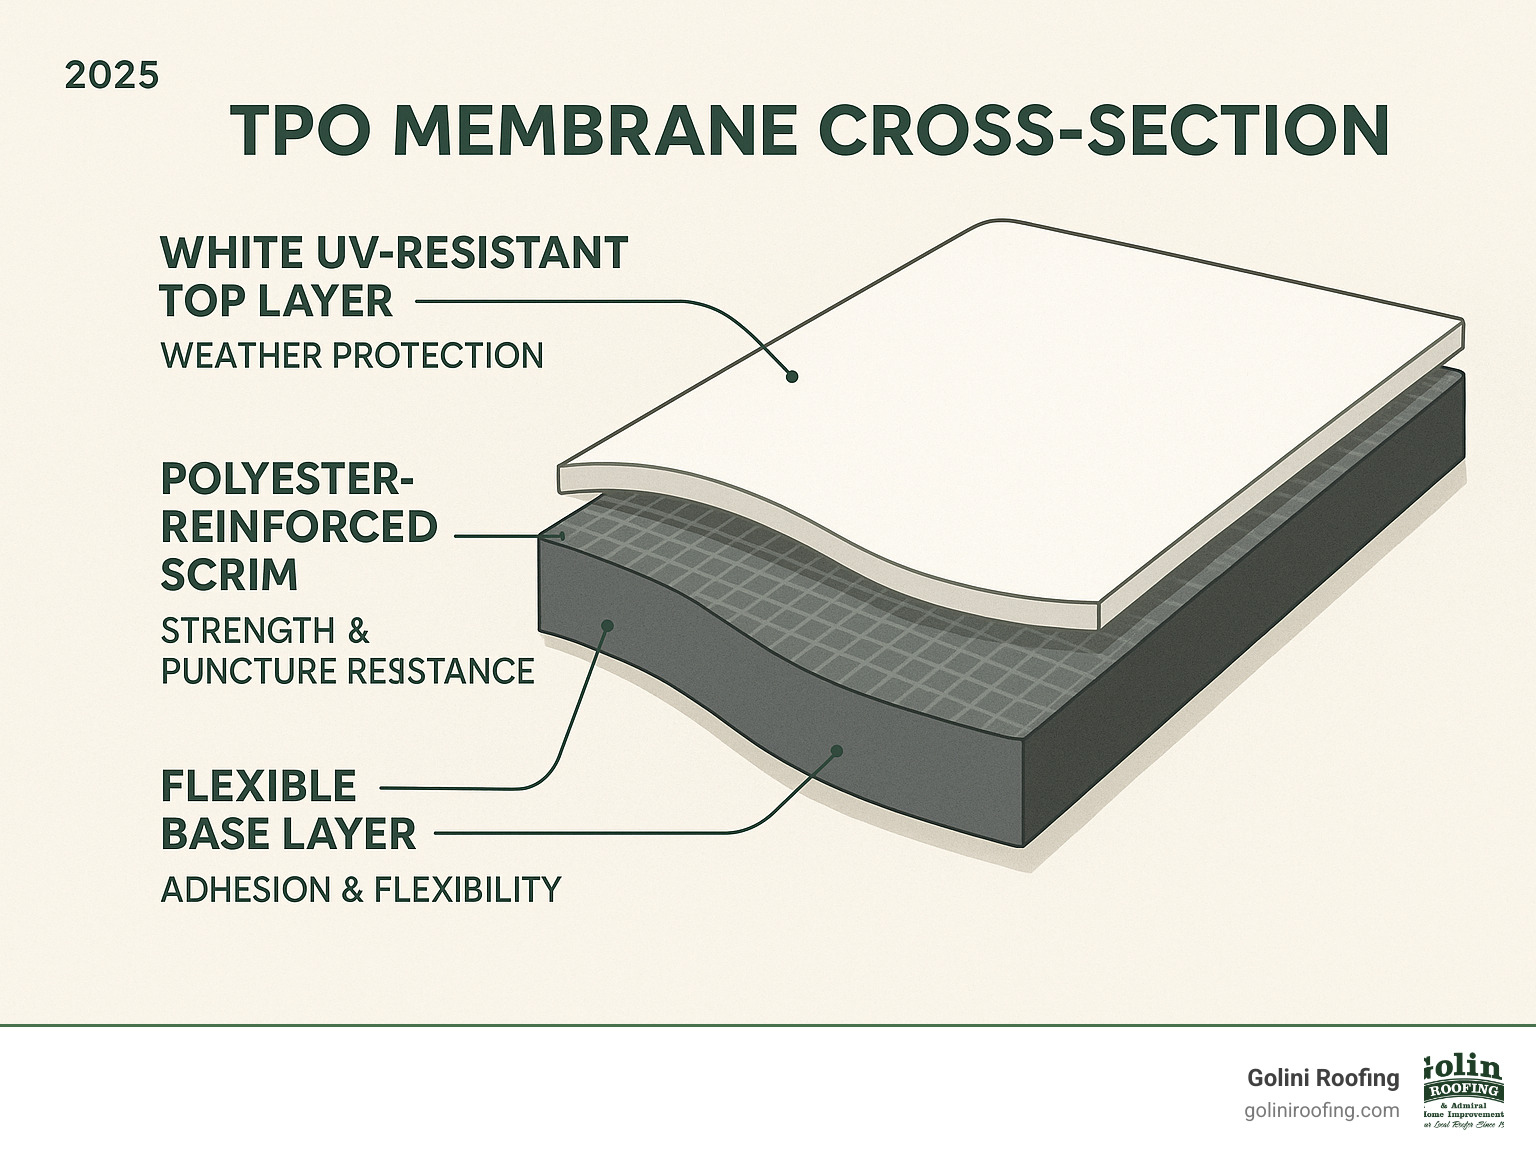
Related content about tpo installation process:
Why Choose a TPO Roofing System?
If you’re considering roofing options for your commercial building, TPO (Thermoplastic Polyolefin) deserves serious attention. After installing commercial roofs for over three decades, I can tell you that TPO has earned its reputation as one of the smartest choices for flat and low-slope commercial buildings.
The durability of TPO roofing really sets it apart. These membranes are built tough – they resist punctures from foot traffic and rooftop equipment, while maintaining their flexibility through New England’s temperature swings. Unlike some roofing materials that become brittle over time, TPO stays flexible, moving with your building without cracking.
But here’s where TPO really shines: energy savings. That bright white surface isn’t just for looks – it’s your building’s personal air conditioning helper. TPO creates what we call a cool roof by reflecting sunlight instead of absorbing it like darker materials. This means your HVAC system doesn’t have to work as hard during those sweltering summer months, and you’ll see the difference in your energy bills.
The UV resistance built into TPO membranes is impressive too. Massachusetts sun can be brutal on roofing materials, but TPO’s formulation includes UV stabilizers that protect against degradation year after year. This translates into long-term weather protection that keeps performing decade after decade.
What really makes TPO special is its strong welded seams. During the TPO installation process, we heat-weld the membrane seams together, creating bonds that are often stronger than the membrane itself. This creates a monolithic, watertight surface – no weak points where water can sneak through.
From a cost-effective standpoint, TPO hits the sweet spot. The material costs are reasonable, installation is efficient, and the long-term performance means fewer headaches down the road. When you factor in the energy savings and minimal maintenance needs, TPO becomes an even smarter investment.
For more information about our comprehensive commercial roofing solutions, visit our Commercial Roofing page.
Critical Pre-Installation Preparation
A successful TPO installation process depends entirely on the preparation of the roof deck. Before rolling out the membrane, the deck must be perfect. After 35 years in this business, I’ve seen how cutting corners on preparation leads to roof failure.
First, we conduct a thorough roof inspection to identify any potential problems. All old roofing materials must be removed, including loose aggregate, tar, old membrane, dirt, and debris. This meticulous substrate cleaning is vital, as even minor contamination can prevent proper adhesion.
For re-roofing projects, the roof tear-off is planned carefully to protect your building. Once stripped, we inspect the deck for any structural damage or rot that needs repair.
Moisture checks are also critical. Installing TPO over damp surfaces will cause long-term problems like mold and adhesion failure. We use moisture meters and visual inspections to ensure the substrate is completely dry.
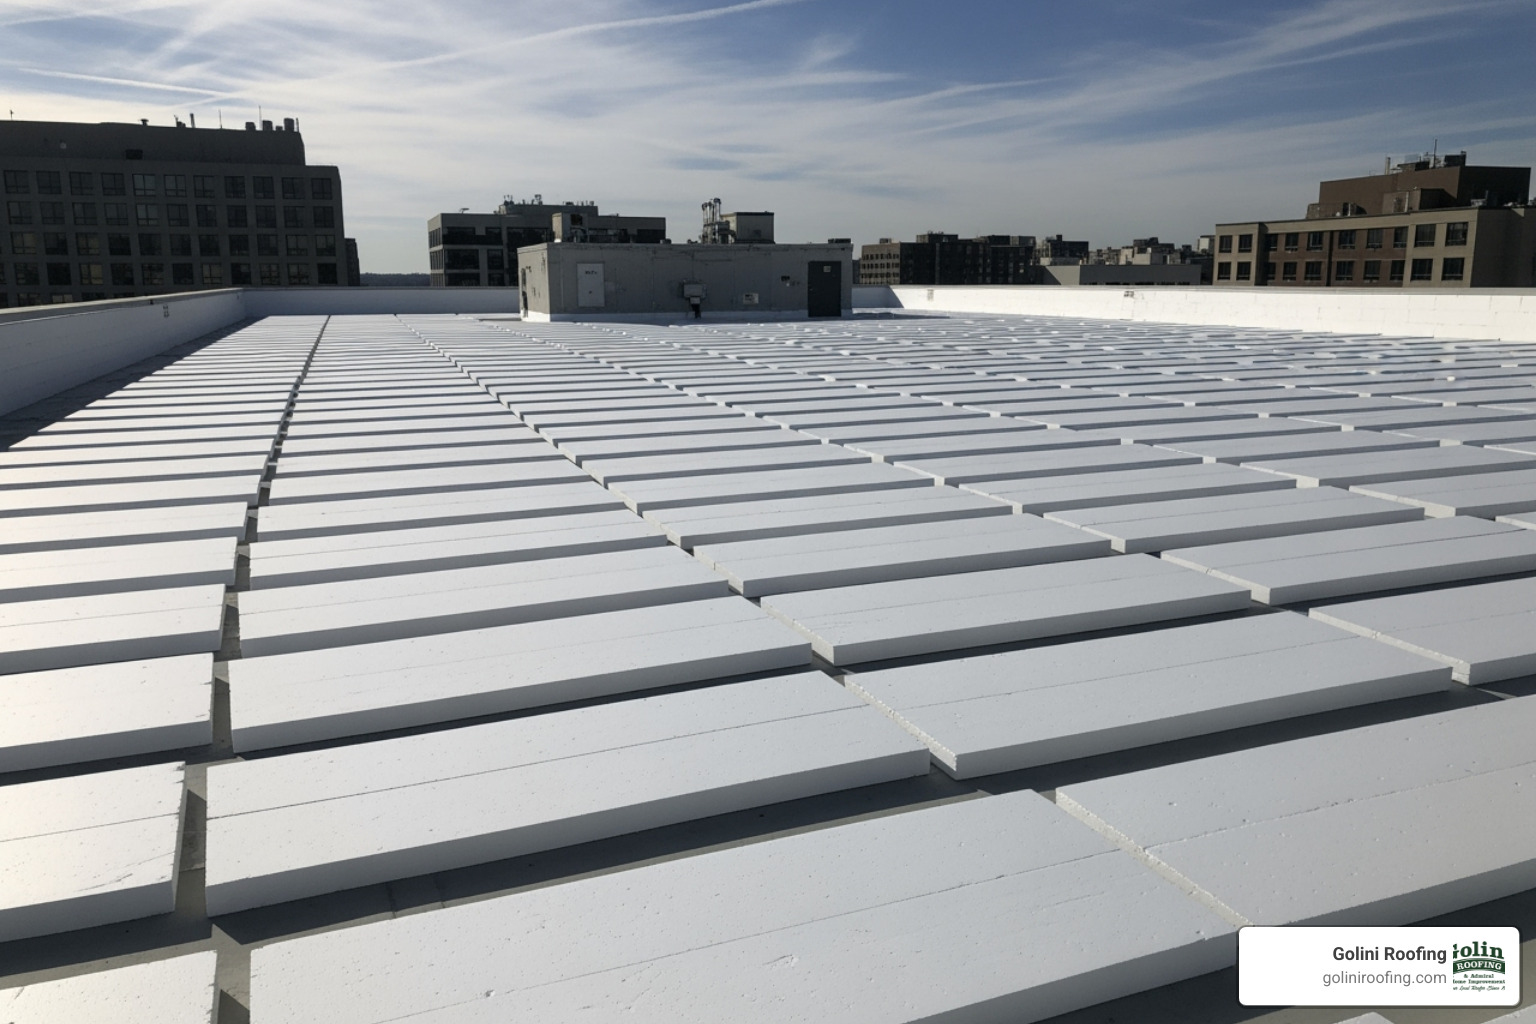
Next is insulation installation. We typically use polyisocyanurate (polyiso) for its excellent thermal performance. Boards are laid in parallel courses with tightly butted, staggered joints for stability. We only install as much insulation as we can cover with TPO membrane the same day to prevent moisture exposure.
The final preparation step is installing a cover board over the insulation. This protective layer creates a smooth surface for the TPO, protects the insulation, and improves the system’s fire and puncture resistance.
If your existing flat roof has issues, our team provides comprehensive Flat Roof Repair services to prepare it for your new system. Proper preparation is what separates a roof that lasts 30 years from one that fails in five.
The TPO Installation Process: A Step-by-Step Guide
The actual tpo installation process is a carefully orchestrated series of steps that transforms rolls of membrane into a seamless, protective barrier. Let’s walk through the key stages.
Choosing Your Attachment Method: Mechanically Fastened vs. Fully Adhered
A key decision in the TPO installation is the attachment method. The two primary options, mechanically fastened and fully adhered, each have unique advantages. The best choice depends on the roof structure, wind uplift requirements, and budget.
| Feature | Mechanically Fastened TPO System | Fully Adhered TPO System |
|---|---|---|
| Cost | Generally lower initial material cost; faster installation can reduce labor costs. | Higher material cost due to adhesive; can be more labor-intensive. |
| Installation Speed | Often faster, as large sheets are rolled out and fastened in rows. | Can be slower due to adhesive application and flash-off times (unless self-adhered). |
| Wind Uplift Resistance | Excellent, fasteners directly anchor membrane to the deck; spacing adjusted for wind zones. | Excellent, strong bond across the entire surface distributes uplift forces evenly. |
| Appearance | May show “pillowing” or “fluting” between fastener rows, especially on larger spans. | Smooth, monolithic appearance; conforms better to the roof surface. |
| Substrate | Can be installed over various deck types (steel, wood, concrete) with appropriate fasteners. | Requires a smooth, compatible substrate (often a cover board) for proper adhesion. |
| Noise | Can be noisier during installation due to mechanical fastening. | Generally quieter installation. |
| Environmental Impact | Fewer VOCs (Volatile Organic Compounds) compared to some adhesives. | Traditional adhesives may contain VOCs; self-adhered options are VOC-free. |
Mechanically Fastened Systems: The TPO membrane is physically attached to the roof deck using fasteners and plates, typically installed along the edges of the sheets. This creates a highly secure system, particularly effective against wind uplift.
Fully Adhered Systems: The TPO membrane is glued directly to the insulation or cover board with a bonding adhesive. This creates a smooth, continuous surface that distributes wind uplift forces evenly.
A newer innovation is the self-adhered TPO membrane, which comes with factory-applied adhesive. This speeds up installation, eliminates VOCs from liquid adhesives, and ensures consistent adhesive coverage, often leading to lower labor costs.
For a general overview of our roofing installation services, check out our Roof Installation Process page.
Executing the TPO Installation Process: Rolling and Fastening
With the substrate prepared and attachment method chosen, we roll out the TPO membrane. This stage of the tpo installation process requires precision to ensure a smooth, durable, and watertight surface.
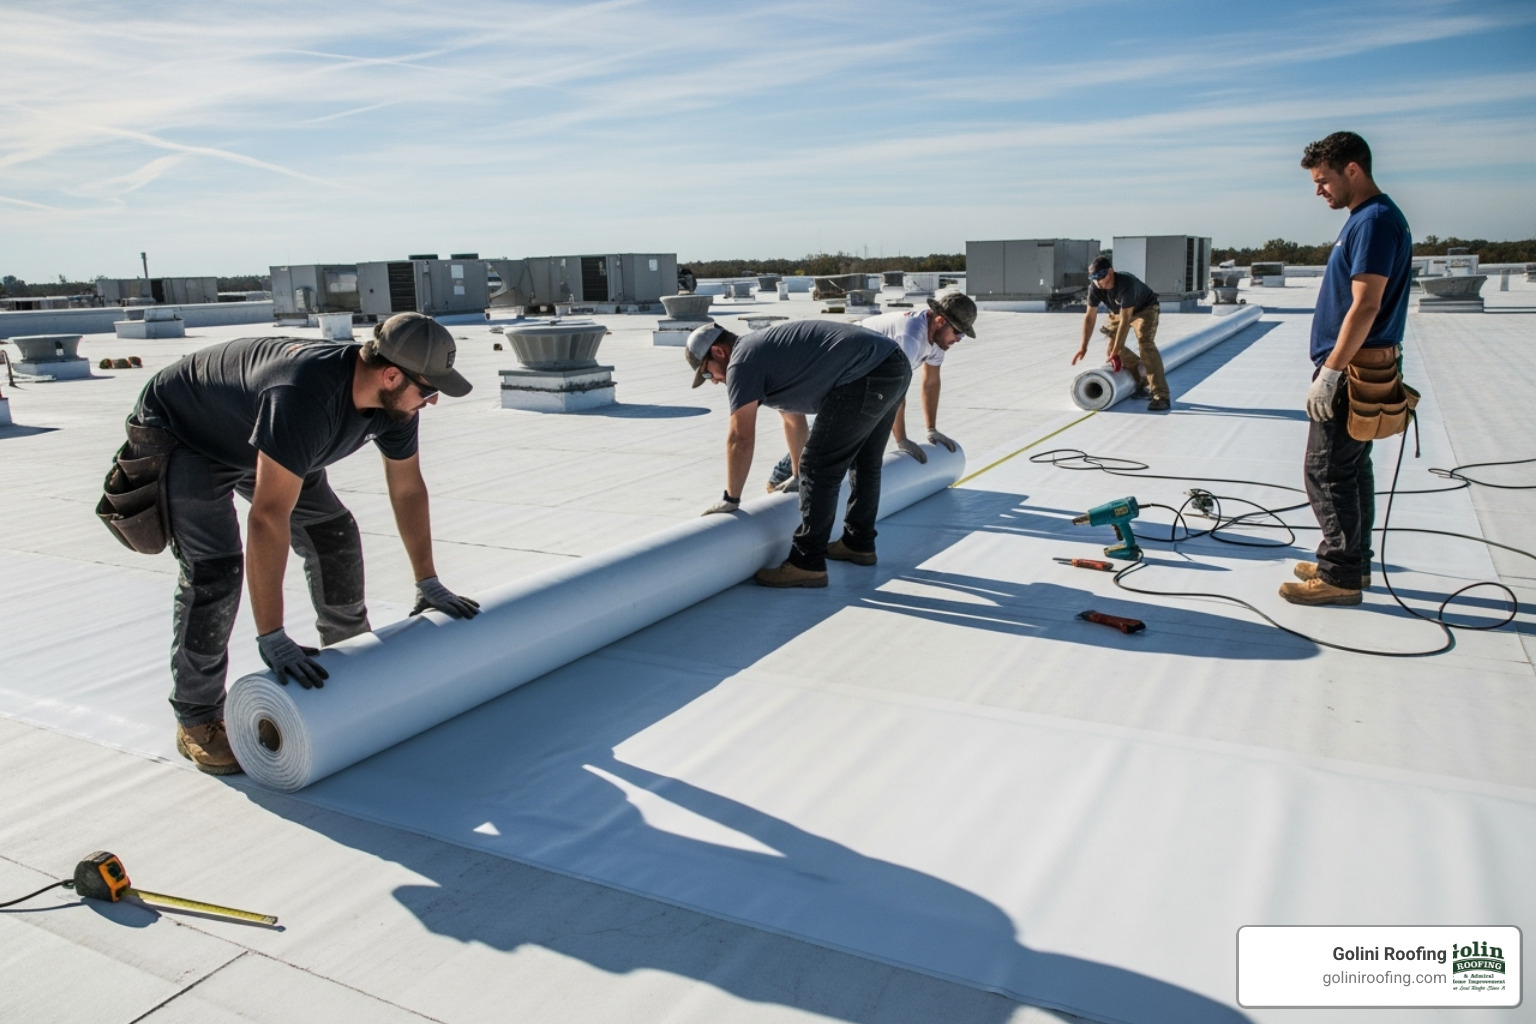
Here’s our approach:
- Proper Layout: We carefully plan the layout, often rolling sheets perpendicular to the slope, starting from the low point to ensure proper water flow.
- Minimizing Mess: We use shoe booties to keep the white TPO membrane clean, reducing cleanup at the end of the job.
- Membrane Relaxation: We allow unrolled sheets to relax, especially in cold weather, to ensure they lay flat and prevent wrinkles during welding.
- Seam Overlap: Each sheet is overlapped by a minimum of 6 inches to create a wide, strong seam for heat welding and to cover any mechanical fasteners.
- Fastener Patterns: For mechanically fastened systems, fastener spacing is engineered based on local wind uplift codes to ensure the roof is secure.
- Clean Work Surface: We maintain a clean surface throughout, as debris trapped under the membrane can cause imperfections or punctures.
This systematic approach lays the groundwork for the most crucial step: heat welding.
The Critical Step in the TPO Installation Process: Heat Welding Seams
The true strength and watertight integrity of a TPO roof come from its heat-welded seams. In the tpo installation process, sheets are fused together with heat, creating a bond that is often stronger than the membrane itself.
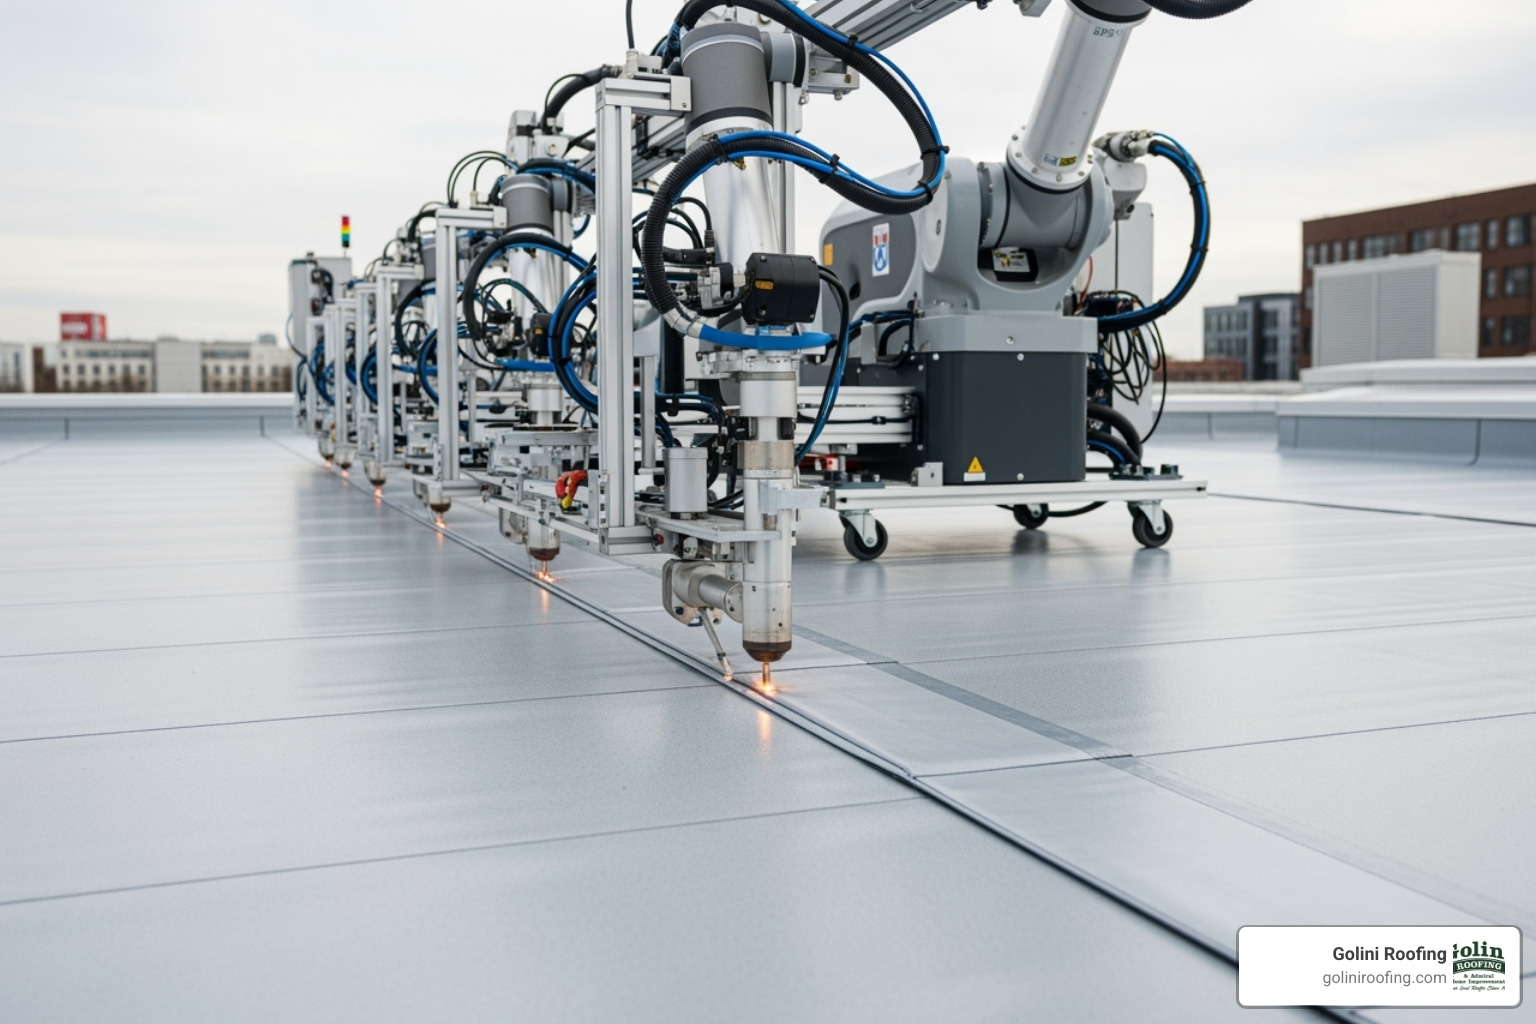
Here’s how we ensure strong, watertight seams:
- Heat Welding Equipment: We use automatic robotic welders for field seams for consistency and specialized hand welders for details and corners.
- Temperature and Speed: Optimal settings (e.g., 10 ft/min at 900°F) depend on ambient conditions and membrane thickness. We fine-tune these settings for every job.
- Test Welds: We always perform test welds on scrap membrane to calibrate the welder and ensure a perfect bond before starting on the roof.
- Cleanliness is Key: Membrane surfaces must be perfectly clean for a strong weld. We use a specialized cleaner if the membrane has been exposed or is dirty.
- Monolithic Seal: Correct heat welding creates a seamless, monolithic seal across the entire roof, eliminating weak points.
- Seam Probing and Quality Control: After cooling, our crew probes every inch of every seam with a blunt tool to find any voids or weak welds. Any deficiencies are repaired immediately to ensure 100% watertightness.
You can see TPO welding techniques in action by searching for TPO welding techniques in action on YouTube.
Finalizing with Flashing and Detail Work
A TPO roof’s integrity is tested by its flashing and detail work. These are the critical transition areas around penetrations and vertical surfaces where leaks are most likely to occur if not installed perfectly.
Here’s how we handle these crucial elements:
- Parapet Walls: We create sharp creases in the membrane to ensure it squares up neatly to the wall for a tight, secure bond, terminating it properly at the top.
- Roof Drains: Drains are carefully sealed. The TPO membrane is cut to fit, and often an additional “target flashing” is used for extra protection.
- Pipe Penetrations and HVAC Curbs: We use pre-molded accessories like TPO pipe seals and sealant pockets (pitch pans) for any penetrations. These are heat-welded to the main membrane for a watertight seal.
- T-Patches and Corner Flashing: At seam intersections and corners, we apply T-patches or pre-formed corner flashing to reinforce these vulnerable areas.
- Sealants: Specific sealants are used for cut edges where the reinforcing scrim is exposed and to seal termination bars.
- Water-Tight Details: Every detail is executed with precision, ensuring all flashing extends the required distance and terminates at the proper height to create a continuous, water-tight envelope.
The goal is to create a continuous, water-tight envelope around every break in the roof’s surface. This meticulous attention to detail is what truly sets a professionally installed TPO roof apart. Learn more about how we ensure your roof stays dry with our Commercial Roofing Waterproofing services.
How to Select a Qualified TPO Roofing Contractor
Finding the right contractor for your tpo installation process can make or break your roofing investment. I’ve seen too many beautiful TPO membranes ruined by poor installation techniques, and frankly, it breaks my heart. After 35+ years in this business, I can tell you that the contractor you choose is just as important as the membrane itself.
Manufacturer certification should be at the top of your checklist. This isn’t just a nice-to-have – it’s essential. Certified contractors have undergone rigorous training on specific TPO products and installation methods. More importantly, they’re authorized to offer NDL warranties (No-Dollar Limit warranties). These comprehensive warranties protect you against leaks caused by both material defects and installation errors, giving you peace of mind that goes far beyond basic coverage.
When evaluating contractors, make sure they’re licensed and insured in your state. This might seem obvious, but you’d be surprised how many property owners skip this step. Proper licensing and bonding protect you from liability if something goes wrong during the project.
Commercial experience matters tremendously. Installing TPO on a 50,000 square foot warehouse is vastly different from a small residential application. Look for contractors who specialize in commercial work and can show you a project portfolio of similar buildings. Don’t be shy about asking to see photos of their completed projects – any reputable contractor will be proud to share their work.
A contractor’s local reputation tells you everything you need to know about their consistency and reliability. Check online reviews, but more importantly, ask for references from recent commercial clients. A quick phone call to a past customer can reveal insights you won’t find anywhere else.
Finally, inquire about their safety record. Professional roofing contractors take safety seriously because they know it protects both their workers and your property. Ask about their safety protocols and training programs.
The right contractor will meet all these criteria without hesitation. They’ll be transparent about their certifications, eager to share their portfolio, and confident in their reputation. When you’re ready to move forward with your TPO project, we’re here to help with our proven expertise in commercial roofing installations.
Learn more about our qualifications and approach on our Commercial Roof Contractors page.
Frequently Asked Questions about TPO Installation
Here are answers to the most common questions we receive about the tpo installation process.
What are the benefits of a self-adhered TPO membrane?
Self-adhered TPO membranes are a fantastic innovation in roofing technology. The biggest advantage is faster installation. Since the adhesive is factory-applied, we simply remove the release liner and roll it into place, which can significantly cut installation time.
From a health and environmental standpoint, these membranes are typically VOC-free, eliminating the Volatile Organic Compounds found in many traditional bonding adhesives.
The consistent adhesive thickness from the factory ensures perfect, uniform coverage every time. This translates to reduced labor costs for our clients and immediate adhesion that lets us move through the project more efficiently.
How long does a professionally installed TPO roof last?
A properly installed TPO roof should last 15 to 30 years. The lifespan depends heavily on the quality of the initial tpo installation process and subsequent maintenance. Every step, from preparation to welding, directly impacts longevity.
Membrane thickness also matters. We work with membranes from 45-mil to 80-mil or thicker. Thicker membranes provide extra puncture resistance and durability, especially for roofs with regular maintenance traffic.
Climate factors like New England’s summer sun and winter ice also play a role. TPO handles these conditions well, but extreme weather takes its toll over time.
The secret to maximizing your TPO roof’s lifespan is regular maintenance. Annual inspections and prompt repairs can add years to your roof’s life. Our Commercial Roof Maintenance Plan is designed for this purpose.
Is it safe to walk on a TPO roof?
While TPO is tough and puncture-resistant, it is not designed for regular, heavy foot traffic. Occasional maintenance access is generally fine with proper precautions.
We always recommend using designated walkways made of heat-weldable TPO material for areas that will see regular traffic, like paths to HVAC units. These walkways provide an extra protective layer.
For specific maintenance work, protective mats are your best friend, as they distribute weight and protect the membrane from tools. The key is avoiding sharp objects, as a dropped tool can easily puncture the membrane.
Membrane protection should always be the priority. When we install your TPO roof, we’ll walk you through the specific care recommendations for your system to ensure it serves you well for decades.
Conclusion
When you step back and look at the complete tpo installation process, it’s pretty amazing how many precise steps come together to create a roof that can protect your business for decades. From that first careful inspection of the roof deck all the way through the final seam probe, every single detail matters more than you might think.
What I’ve learned over my 35 years in this business is that installation quality truly makes or breaks a TPO roof’s performance. You can have the finest membrane money can buy, but if it’s not installed with the right techniques and attention to detail, you’re setting yourself up for headaches down the road. That’s why we’re so committed to doing things right the first time.
The beauty of TPO lies not just in its energy efficiency or durability, but in how all those heat-welded seams create one continuous, watertight barrier across your entire roof. When done properly, it’s like having a custom-fitted protective shell over your building – pretty remarkable when you think about it!
At Golini Roofing, we’ve been perfecting our TPO installation techniques since these membranes first became popular. Our team understands that your roof isn’t just another construction project – it’s protecting your investment, your employees, and your business operations every single day. That’s a responsibility we take seriously.
Whether you’re dealing with an aging roof that needs replacement or you’re planning a new construction project, the right TPO installation can give you peace of mind for years to come. We’d love to show you what professional expertise and genuine craftsmanship look like in action.
Ready to get started on your commercial TPO roof? Contact us for your commercial TPO roof installation and let’s talk about how we can protect what matters most to your business.
