
Why Bitumen Flat Roof Repair Matters for Your Home
Bitumen flat roof repair is something most homeowners will face at some point — and acting fast makes all the difference.
Here’s a quick summary of what you need to know:
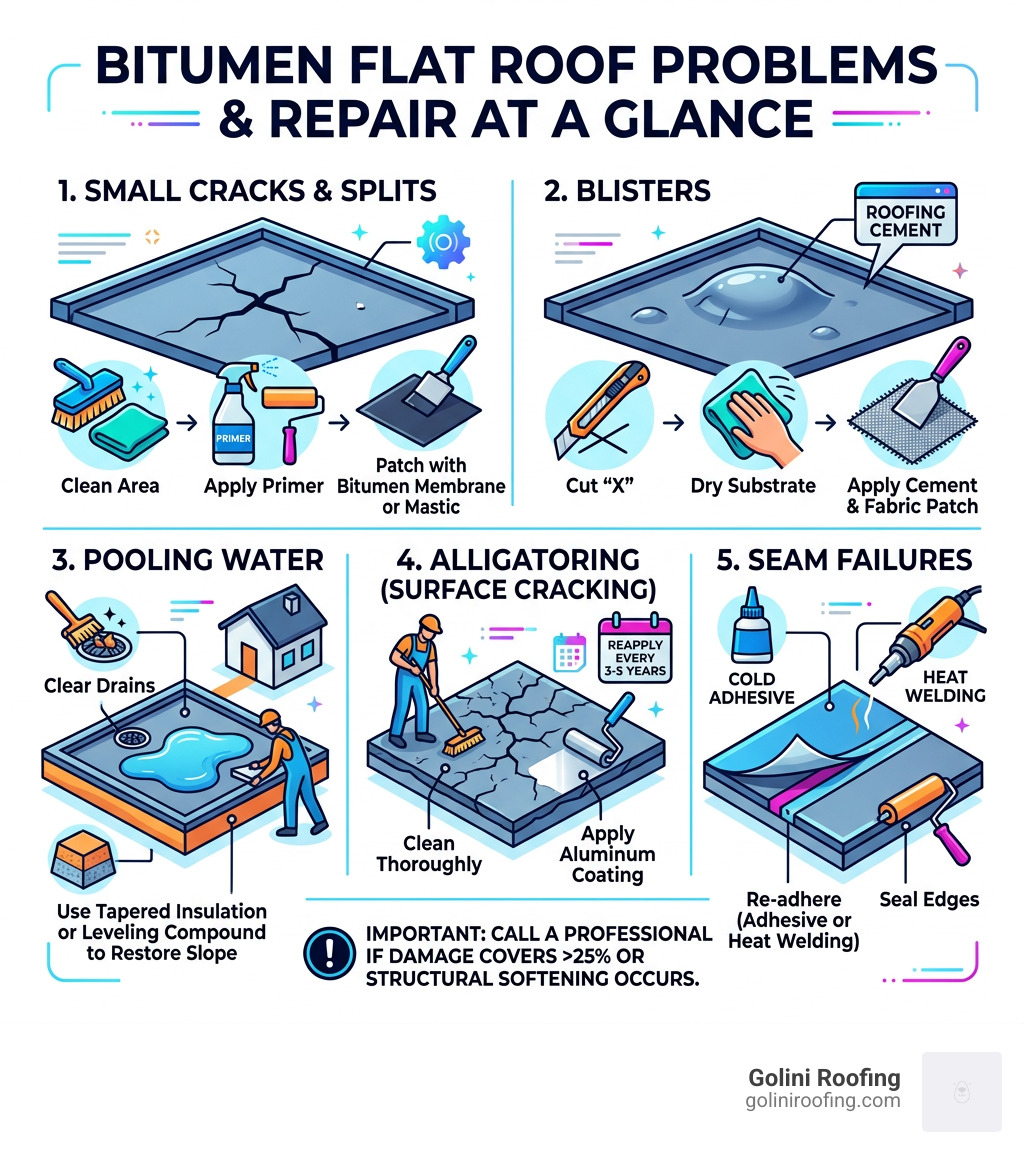
- Small cracks and splits: Clean the area, apply primer, and patch with a bitumen membrane or cold-applied mastic
- Blisters: Cut an “X” over the blister, dry the substrate, apply roofing cement, press down, and reinforce with a fabric patch
- Pooling water: Clear drains and consider tapered insulation or a leveling compound to restore slope
- Alligatoring (surface cracking): Clean thoroughly and apply an aluminum roof coating; reapply every 3-5 years
- Seam failures: Re-adhere with cold adhesive or heat welding, then seal edges
Minor repairs can often be handled as a DIY project. But if damage covers more than 25% of your roof, or you’re seeing structural softening, it’s time to call a professional.
Bitumen flat roofs are a popular choice for homes and garages in Massachusetts — they’re durable, waterproof, and relatively straightforward to maintain. But they’re not immune to wear. UV exposure, freeze-thaw cycles, trapped moisture, and debris buildup all take a toll over time. Left unchecked, a small crack can become a costly leak.
The good news: with the right knowledge and materials, most common problems are fixable before they escalate.
Our team of roofing experts has been repairing and replacing bitumen flat roofs across the North Shore area since 1982 — giving us over four decades of hands-on experience with bitumen flat roof repair in New England’s demanding climate. In this guide, we’ll walk you through everything you need to know to diagnose, repair, and maintain your bitumen roof with confidence.
Easy bitumen flat roof repair word list:
Understanding Your Roof: Types of Bitumen Membranes
Before we jump into the “how-to” of bitumen flat roof repair, we need to know what we are standing on. Bitumen is essentially a sticky, black petroleum-based material (asphalt) that provides the waterproofing for your roof. In the residential world, especially around Burlington and Reading, you’ll likely find one of three main systems.
Modified Bitumen (MB)
This is the modern evolution of flat roofing. These membranes are factory-fabricated rolls of asphalt that have been “modified” with polymers to make them more flexible and durable.
- SBS (Styrene-Butadiene-Styrene): This type uses a rubberized modifier. It is highly flexible and handles the “thermal shock” of Massachusetts winters (going from freezing nights to sunny days) very well.
- APP (Atactic Polypropylene): This uses a plastic modifier. It is generally tougher and more UV-resistant, often installed using a torch-down method.
Built-Up Roofing (BUR)
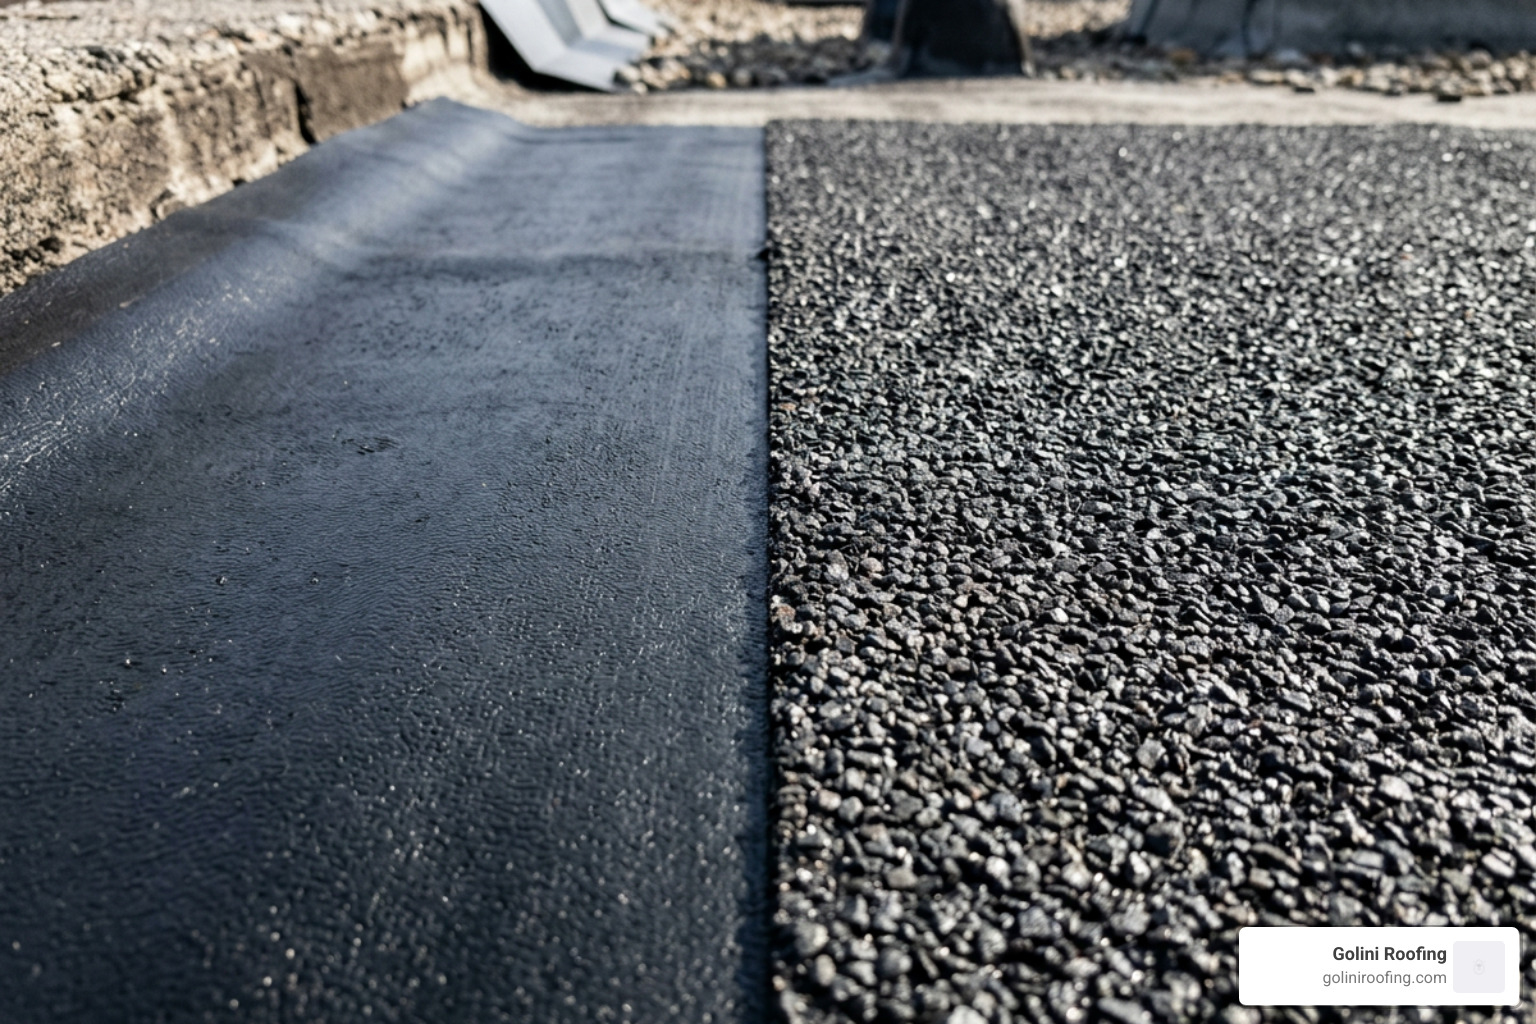
If your roof looks like a “tar and gravel” sandwich, it’s likely a BUR system. These are constructed on-site using multiple layers of bitumen-soaked felt. While they once represented half of all flat roof coverings, many homeowners are now transitioning to Modified-Bitumen Flat Roofs because they are lighter and easier to patch.
Reinforcement Layers
Regardless of the type, these membranes are usually reinforced with either a fiberglass mat (for stability) or polyester fabric (for puncture resistance). Knowing which one you have helps in choosing the right flat roof repair materials.
Common Problems Requiring Bitumen Flat Roof Repair
Living in towns like Wakefield and Stoneham, our roofs take a beating from heavy snow, autumn leaves, and intense summer sun. Here are the usual suspects that lead to a leak.
Thermal Expansion and Cracking
Because flat roofs have no shingles to “breathe,” the entire membrane expands and contracts. Over time, this causes small splits or “alligatoring.” Alligatoring looks exactly like it sounds—the surface of the bitumen cracks into a pattern resembling reptile skin. This is a sign that the oils in the asphalt have dried out due to UV degradation.
Blisters
Blisters are raised bubbles on the roof surface. They occur when air or moisture gets trapped between the layers of the membrane. When the sun hits the roof, that moisture expands, lifting the material. Never step on a blister! You might pop it and create an immediate leak.
Ponding Water
No roof should be perfectly flat. They should have a slight pitch (at least 1/4 inch per foot) to shed water. If you see standing water 48 hours after a rainstorm, you have a ponding problem. This extra weight stresses the structure and accelerates membrane rot. You can find more details on the cost to repair flat roof ponding if this is your primary issue.
Table: Minor Cracks vs. Structural Damage
| Feature | Minor Crack/Split | Structural Damage/Softening |
|---|---|---|
| Appearance | Clean line or surface crazing | Sunken areas, large sags, or “spongy” feel |
| Leak Severity | Slow drip or damp spots | Active streaming or ceiling collapse |
| Repair Method | DIY Patching/Mastic | Professional replacement of decking/insulation |
| Urgency | Repair within 1-2 weeks | Immediate emergency attention required |
How to Perform a DIY Bitumen Flat Roof Repair
If you’ve spotted a small crack or a localized puncture, you can often handle the bitumen flat roof repair yourself using “cold-applied” methods. This avoids the need for dangerous torches.
Tools and Materials Needed
- Bitumen Primer: Essential for ensuring the patch sticks to the old, dusty roof.
- Cold-Applied Mastic/Roofing Cement: Look for products that meet ASTM D-3019 Standards for the best performance.
- Reinforcement Fabric: A mesh or polyester mat to bridge the gap.
- Utility Knife and Wire Brush: For cleaning and cutting.
Step-by-Step Patching
- Preparation: Use your wire brush to scrub away all loose granules, dirt, and debris. The area must be bone-dry.
- Priming: Apply a thin layer of bitumen primer. Let it sit until it becomes “tacky” (usually 30 minutes to 2 hours).
- The First Layer: Spread a layer of roofing cement over the crack, extending at least 6 inches beyond the damage.
- Reinforce: Embed your reinforcement fabric into the wet cement. Press it down so there are no air bubbles.
- The Final Seal: Apply a second layer of cement over the fabric, feathering the edges so water runs off smoothly.
If you are dealing with a more elusive drip, check out our guide on roof leak repair for flat roofs.
Fixing Blisters and Seam Failures
Blisters and failing seams require a slightly different approach than a simple crack.
The X-Cut Technique for Blisters
To fix a blister, you have to get the moisture out.
- Cut: Carefully use a utility knife to cut an “X” through the raised membrane.
- Dry: Peel back the four flaps. If there is standing water inside, soak it up with a rag and let the sun dry the substrate completely.
- Cement: Apply roofing cement generously underneath the flaps.
- Seal: Press the flaps back down into the cement.
- Patch: Treat the repaired “X” like a standard patch by applying another layer of cement and a piece of reinforcement fabric over the top.
Resealing Seams
Seams often fail because of poor initial installation or “fish-mouthing” (where the edge curls up). If the seam is loose, clean underneath it, apply a heavy bead of bitumen sealant, and use a weighted roller or a heavy brick to hold it down while it cures. For more complex seam issues, you might need professional flat roofing repair.
Maintenance and Longevity: Extending Your Roof’s Life
A well-maintained modified bitumen roof can last 25 years or longer. In towns like Lynnfield and Woburn, where we get plenty of snow and sun, maintenance is your best friend.
Reflective and Aluminum Coatings
One of the best things you can do for a bitumen roof is to apply an aluminum roof coating. These silver coatings reflect UV rays, which prevents the asphalt from drying out and cracking (alligatoring).
- Benefit: These coatings can lower your home’s cooling costs by 15% to 30%.
- Frequency: Reapply every 3 to 5 years for maximum protection.
Routine Inspections
We recommend walking your roof at least twice a year—once in the spring and once in the fall. Look for:
- Debris Build-up: Leaves and twigs trap moisture against the membrane.
- Gutter Health: Ensure your gutter services are up to date. Clogged gutters lead to water backing up onto the flat roof.
- Drainage: Clear any “scuppers” or internal drains.
Professional vs. DIY: Costs and Considerations
While a small patch is a great Saturday afternoon project, some bitumen flat roof repair tasks are best left to the pros.
The Cost Factor
Based on internet data, here is a look at what you might expect for average costs (note: these are not specific quotes for our company):
- Minor DIY Patching: $50 – $200 for materials.
- Minor Professional Repairs: $150 – $1,500 depending on the extent of damage.
- Major Repairs (Hot-Mop or Torch-On): $1,200 – $4,500+.
- Full Replacement: $4,000 – $12,000+ depending on roof size and materials.
Labor often makes up 70% of the cost for professional work, with rates averaging $50 to $80 per hour. You can use our flat roof replacement cost calculator to get a better sense of your budget.
Safety and Specialized Techniques
Professionals often use “torch-down” techniques, where a propane torch melts the bitumen to create a permanent, fused seal. We do not recommend DIY torching. The fire risk to your home is significant if you aren’t trained. Furthermore, a professional can offer a warranty that a DIY patch simply cannot match. For more on the financial side, read our flat roof repair cost guide.
When to Seek Professional Bitumen Flat Roof Repair
You should put down the trowel and call us if you see:
- Extensive Alligatoring: If the whole roof looks like a dry lake bed, a patch won’t save it.
- Soft Spots: If the roof feels “spongy” when you walk on it, the wooden deck underneath may be rotting.
- Widespread Leaks: Multiple leaks usually indicate the membrane has reached the end of its 10-20 year lifespan.
- Warranty Requirements: If your roof is still under a manufacturer’s warranty, DIY repairs might void it.
If you’re unsure if you need a fix or a whole new system, check out our new flat roof cost estimate page for guidance.
Frequently Asked Questions about Bitumen Flat Roofs
Can I repair a bitumen roof in the rain?
Yes, but only as an emergency measure. There are “wet-surface” mastics and emergency patches designed to stick even in a downpour. However, these are temporary. For a long-lasting bitumen flat roof repair, you must wait for a dry window so the primer and cement can bond properly to the substrate.
How long do bitumen roof patches last?
A high-quality bitumen roof patch, when applied correctly with reinforcement fabric and primer, can last between 5 to 10 years. Its lifespan depends heavily on whether you apply a UV-protective coating over the patch once it has cured.
Is it better to repair or replace a 20-year-old roof?
At the 20-year mark, you are nearing the end of the typical life expectancy (20-25 years). If the roof is mostly in good shape, a few patches can buy you a few more years. However, if you are spending $500 every year on repairs, it’s more cost-effective to look into the cost to replace a flat roof. A new installation will be more energy-efficient and provide total peace of mind during our heavy Massachusetts snowstorms.
Conclusion
Taking care of your home means staying on top of your roof’s health. Whether you’re tackling a small blister yourself or calling in the experts for a major overhaul, understanding bitumen flat roof repair is the first step toward a dry, safe home.
At our roofing company, we’ve spent over 35 years perfecting the art of the flat roof. Based in Wakefield, MA, we bring a level of meticulous craftsmanship—like our signature hand-nailing for shingle transitions—that other local roofing companies simply can’t match. We serve neighbors throughout Burlington, Lynnfield, Reading, and the surrounding towns, ensuring every roof we touch is built to last.
If you’re worried about a leak or just want a professional eye to check your membrane, don’t wait for the next storm. Contact us for a Bitumen Roof Estimate today, and let’s make sure your flat roof stays exactly that—waterproof and worry-free.
